If you’ve been curious about the world of hydroponics, you’re in the right place. Hydroponic gardening has taken the urban gardening scene by storm, and for good reason. It’s a clever, space-saving way to grow plants without soil—and it can be done almost anywhere. Whether you’re living in a small apartment or just want to try something new in your backyard, a hydroponic wick system offers a simple and affordable way to dive into this fascinating gardening method.
This post is perfect for beginners who are eager to explore hydroponics but may not know where to start. If you’re looking for easy, DIY projects that require minimal materials and setup, you’ll find valuable ideas here. Each of the eight projects we’ve gathered is designed to help you kick off your hydroponic journey with confidence. You’ll learn about the benefits of the wick system, how to create your own setups, and tips for growing fresh greens right at home.
By the end of this guide, you’ll have actionable ideas that are not only beginner-friendly but also fun and creative. We aim to show you that hydroponic gardening isn’t just for the experts—it’s for everyone who wants to nurture plants and enjoy fresh produce without the fuss of traditional gardening.
Key Takeaways
– Simple Setup: A hydroponic wick system is perfect for beginners, as it requires few materials and is easy to assemble.
– Space Efficiency: Ideal for urban environments, these systems allow you to grow plants vertically or in small spaces.
– Low Maintenance: Wick systems provide a self-watering mechanism, requiring less frequent attention compared to other gardening methods.
– Creative Projects: Discover innovative DIY ideas like using repurposed materials, which make it fun to personalize your setup.
– Healthy Harvest: These systems can produce fresh, home-grown herbs and greens, promoting healthy eating right from your kitchen.
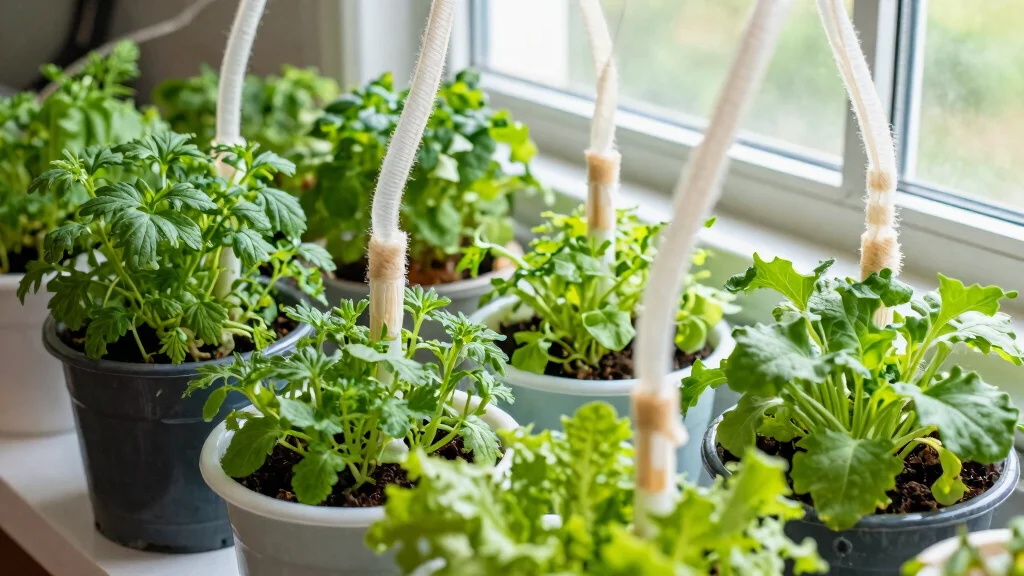
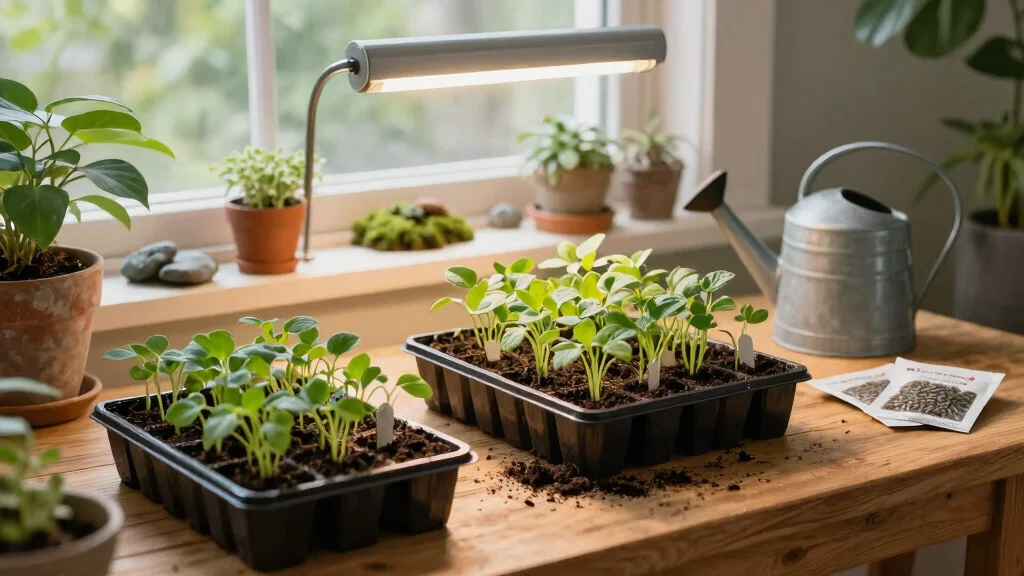
1. Classic Wick System in a Bucket
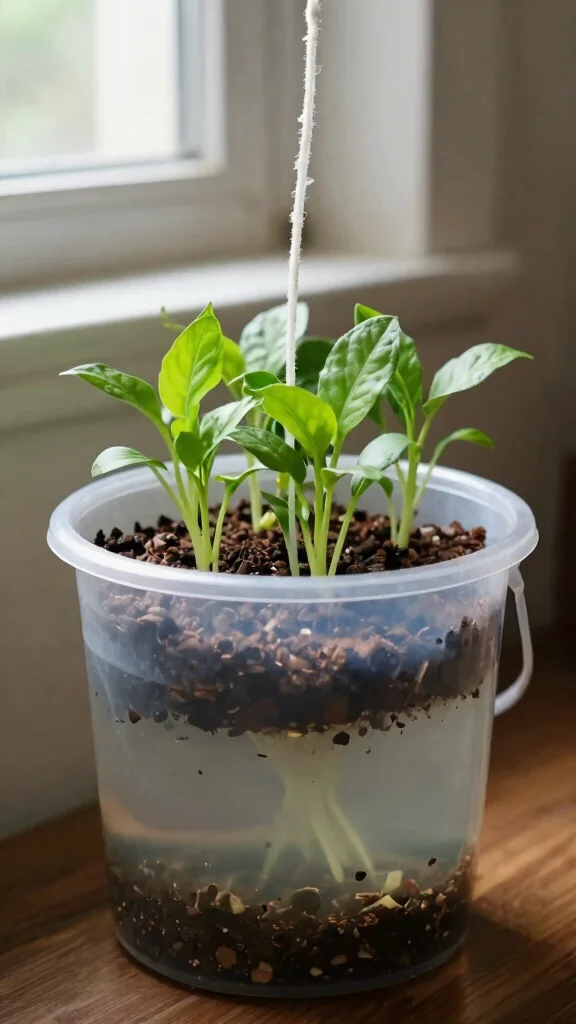
Looking for an easy way to start your hydroponic journey? The classic bucket wick system is perfect for beginners and guarantees fresh results. With just a bucket, a wick, and nutrient-rich water, you can create an ideal environment for your plants to thrive. Drill a small hole in the lid for the wick, fill the bucket with your choice of growing medium like rock wool, and add your seeds or seedlings. The wick draws water up to the roots, providing essential moisture effortlessly.
To ensure success, keep your nutrient levels balanced and check the wick regularly. This simple setup allows you to grow a variety of herbs and greens in small spaces, making it a versatile choice for any home.
Key benefits of the bucket wick system:
– Low maintenance: Perfect for busy lifestyles.
– Space-efficient: Fits well in apartments or balconies.
– Versatile: Grow herbs, greens, or flowers with ease.
With minimal effort, you can enjoy fresh herbs right from your own home!
Fun fact: a simple bucket wick system can jumpstart your hydroponic journey with just a bucket, a wick, and nutrient-rich water. Pro tip: drill a lid hole for the wick and let it draw moisture up to the roots—perfect for beginner-friendly, space-saving setups in urban gardens.
📹 Related Video: Wicking Bucket Containers – Budget Built for patio container gardening
Classic Wick System in a Bucket
Editor’s Choice

30 feet 1/5 inch Self Watering Capillary Wicking Hydroponic Wick Cord Va…

Legigo 1 Inch Rockwool Cubes Seed Starter Plugs for Hydroponics, RockWoo…

Beesworks 100 Piece Cotton Candle Wick 6″ Pre-Waxed for Candle Making, C…
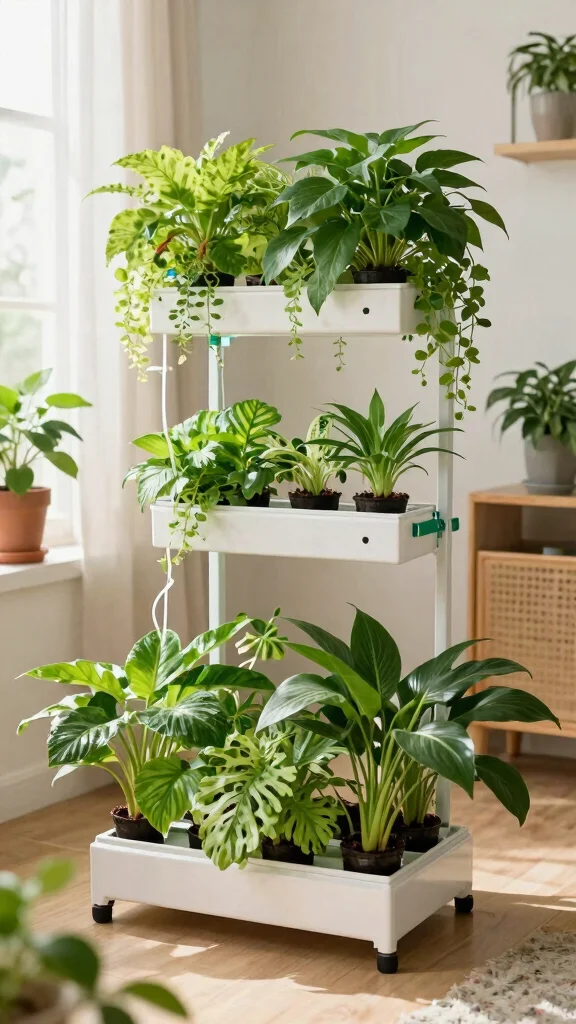
2. DIY Wick System Vertical Garden
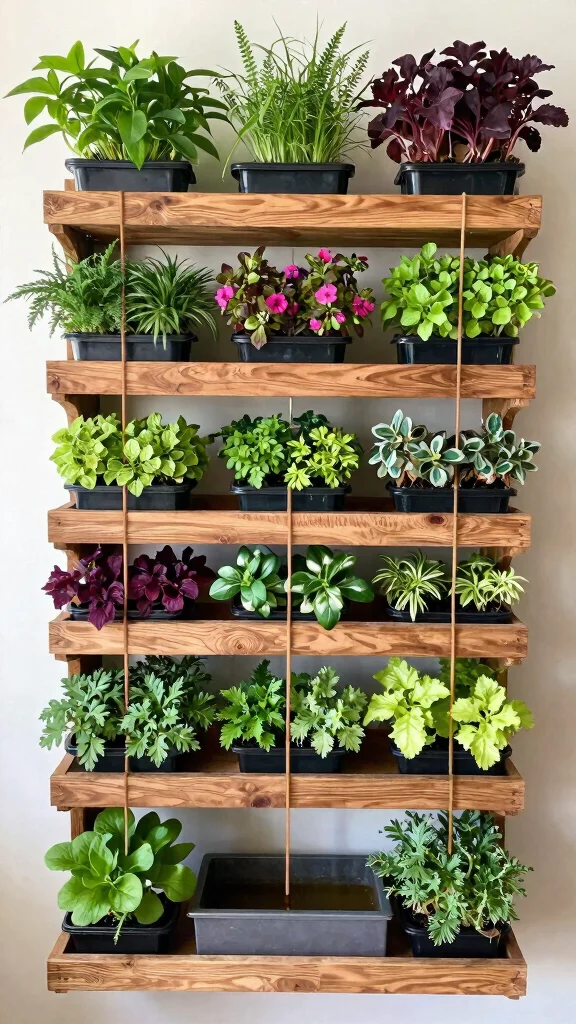
Want to save space while adding an eye-catching feature to your home? A DIY vertical garden using a wick system is an excellent solution. Repurpose old shelves or pallets to create multiple tiers for your plants, each filled with a growing medium. Place a reservoir at the bottom connected to wicks that distribute water to each tier. This clever design ensures that gravity helps nourish your plants efficiently.
As you build your vertical garden, consider using lightweight containers and mixing herbs with flowering plants for visual interest. This setup not only conserves space but also gives you easy access to fresh produce.
Tips for creating your vertical garden:
– Use recycled materials: Get creative with old shelves.
– Choose lightweight containers: Makes maintenance easier.
– Layer plants: Mix colors and textures for aesthetic appeal.
Your vertical garden will impress guests and provide fresh ingredients for your kitchen!
Fun fact: A vertical hydroponic wick system diy setup can grow herbs from a tiny balcony—three tiers fit in just 2 square feet. Gravity powers the water delivery to each tier, so no pumps are needed. Lightweight containers make it easy to rearrange as you grow.
DIY Wick System Vertical Garden
Editor’s Choice

50ft 1/4 inch Plants Self Watering Capillary Wick Rope Cord DIY Vacation…

2LBS Leca Expanded Clay Pebbles Hydroponics Supplies for Indoor Garden P…

12 Pack 3 inch Net Cups Pots with 12 feet Hydroponics Self Watering Wick…
3. Glass Jar Wick System
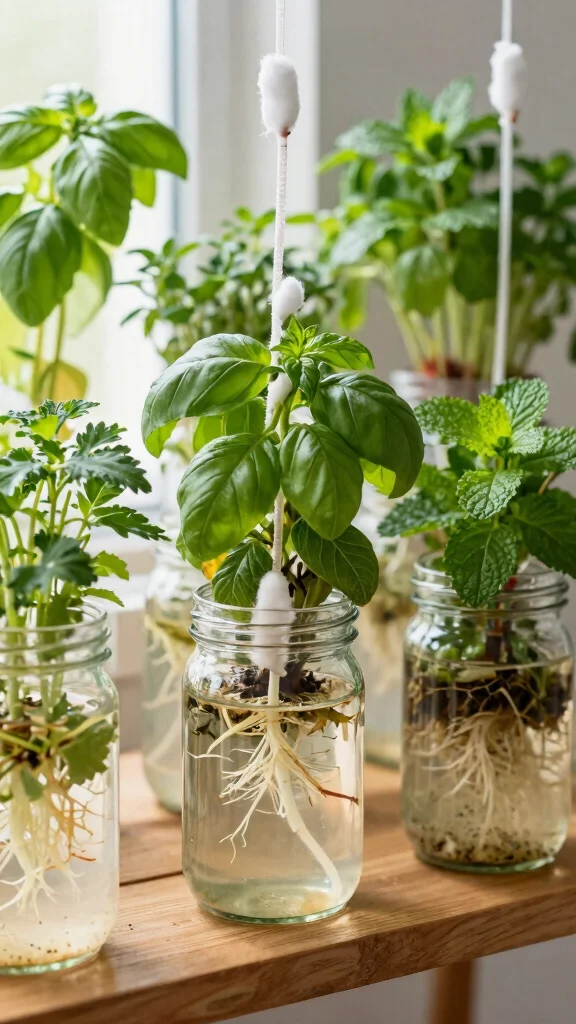
If you appreciate beauty in gardening, the glass jar wick system is your ideal choice. Using clear glass jars allows you to admire the roots as they grow, adding charm to your indoor space. Fill these jars with a lightweight growing medium and connect a cotton wick to a larger nutrient reservoir. This method works wonderfully for herbs like basil and mint, showcasing their roots beautifully.
Enjoy the benefits of this stylish setup by keeping an eye on root growth and using colorful jars to brighten your decor. The portability of glass jars also allows you to move them easily for optimal sunlight.
Highlights of using glass jars:
– Watch the roots grow: Enjoy nature up close.
– Decorative appeal: Choose jars that match your style.
– Easy to relocate: Move them to catch sunlight.
This delightful system combines aesthetics with practicality, perfect for any indoor gardener!
Glass Jar Wick System
Editor’s Choice

Bonsai Starter Kit – Gardening Birthday Gifts for Women & Men – Bonsai T…

ORIMERC 30 feet 1/6 inch Self Watering Capillary Wick Cord Vacation Plan…

Propagation Station – Desktop Plant Hydroponic Vases, Water Plant Jars, …
4. Repurposed Plastic Bottles
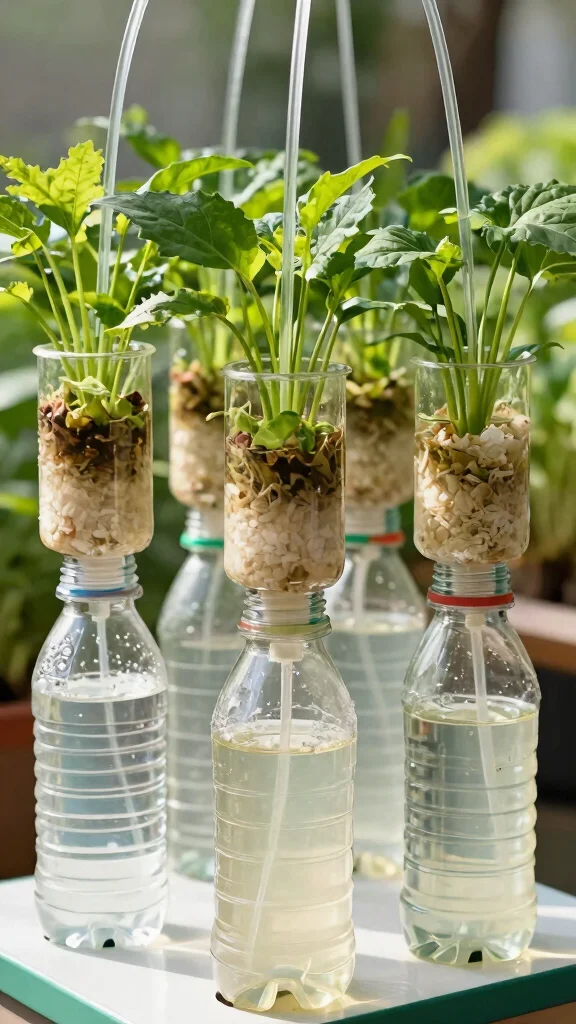
Looking for an eco-friendly gardening solution? Turning plastic bottles into a hydroponic wick system is a fun and sustainable project. Cut the bottles in half, using the bottom as a reservoir and the top for growing medium. Insert a wick that connects the two sections, allowing for easy access to nutrients. This creative recycling project not only minimizes waste but also offers a hands-on DIY experience.
Customize your setup by experimenting with different bottle sizes for various plants, ensuring stability to prevent spills. You can even decorate the bottles for an appealing look.
Tips for transforming plastic bottles:
– Customize sizes: Use various bottles for different plants.
– Secure it well: Avoid spills with stable setups.
– Decorate: Enhance appearance with paint or covers.
With a little imagination, you can make your hydroponic garden both eco-friendly and productive!
You might also like


Difficulty Rating & Requirements
Overall Difficulty Rating: Easy
Creating a hydroponic wick system DIY project is rated as easy. This setup is suitable for beginners who have little to no experience in hydroponics or gardening. It’s straightforward enough for anyone to follow, making it perfect for urban gardeners looking to start their journey in indoor gardening.
Time Estimate:
⏱ Estimated time: 2-4 hours
The time can vary depending on which design you choose. Most projects can be completed in one afternoon. Here’s a rough breakdown:
– Planning and gathering materials: 1 hour
– Assembly: 1-2 hours
– Final adjustments and setup: 30 minutes to 1 hour
Skill Requirements:
– Required skills: Basic measuring, cutting, and assembling skills.
– Beginner-friendly: Yes! This project is designed for those new to hydroponics.
– Skills that can be learned include simple construction techniques and plant care tips. No prior experience is necessary, making it a great entry point for all enthusiasts.
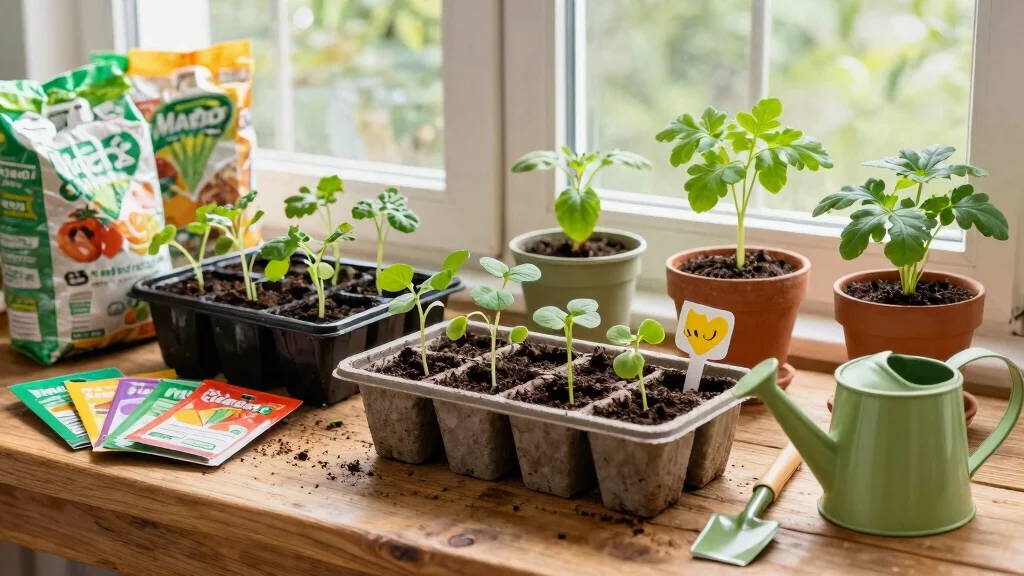
Tools & Materials Needed:
🧰 Essential items checklist:
– Buckets or trays (Required)
– Wicking material (e.g., cotton rope or strips) (Required)
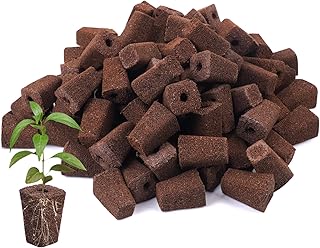
– Growing medium (e.g., clay pellets or perlite) (Required)
– Seeds or seedlings (Required)
– Water reservoir (e.g., a large plastic container) (Required)
– Scissors (Optional, but helpful)
– Measuring tape (Optional, for precise setup)
– LED grow lights (Optional, enhances growth but not necessary for all systems)
Step-by-Step Overview:
1. Planning and Design (30 minutes): Decide on the type of wick system you want to create, gather materials, and sketch your design.
2. Assembly (1-2 hours): Cut your wicking material to the desired length, set up your containers, and fill them with your chosen growing medium.
3. Planting (30 minutes): Plant your seeds or seedlings into the growing medium and ensure the wicking material is properly positioned to absorb water from the reservoir.
4. Final Setup (30 minutes): Add water to the reservoir, check for leaks, and make any necessary adjustments to the setup for optimal growth conditions.
Professional vs DIY:
When comparing costs, a professional hydroponic setup can run anywhere from $500 to $1,500 depending on the complexity and size. In contrast, creating your own DIY hydroponic wick system typically costs around $50 to $150. This makes DIY a budget-friendly option you can customize. If you feel overwhelmed or lack time, seeking professional help might be wise, but for most, this project is perfectly manageable with a little patience and creativity.
Repurposed Plastic Bottles
Editor’s Choice
30 feet 1/5 inch Self Watering Capillary Wicking Hydroponic Wick Cord Va…
50ft 1/4 inch Plants Self Watering Capillary Wick Rope Cord DIY Vacation…
5. Multi-Layered Hydroponic Wick Tray

Maximizing your growing space has never been easier than with a multi-layered hydroponic wick tray system. By stacking trays, you can create a compact solution that allows water to flow from one layer to the next. Each layer can support various plants, making it efficient for growing herbs and easy to tend to your greens.
As you set up your system, select compatible plants that share similar water and light requirements. Regularly monitor water levels to prevent over-saturation and make sure your setup fits comfortably in a sunny spot.
Best practices for your multi-layered tray:
– Choose compatible plants: Ensure they thrive together.
– Monitor water levels: Avoid over-saturation to maintain health.
– Easily movable: Perfect for shelves or sunny windowsills.
This innovative approach helps you cultivate a variety of herbs while keeping your space organized!
Multi-Layered Hydroponic Wick Tray
Editor’s Choice
50ft 1/4 inch Plants Self Watering Capillary Wick Rope Cord DIY Vacation…

10 Plant Growing Trays (with Drain Holes) – 20″ x 10″ – Perfect Garden S…
100 Pack Grow Sponges, Replacement Root Growth Sponges Seed Pods,Seed St…
6. Hydroponic Wick System with LED Lighting
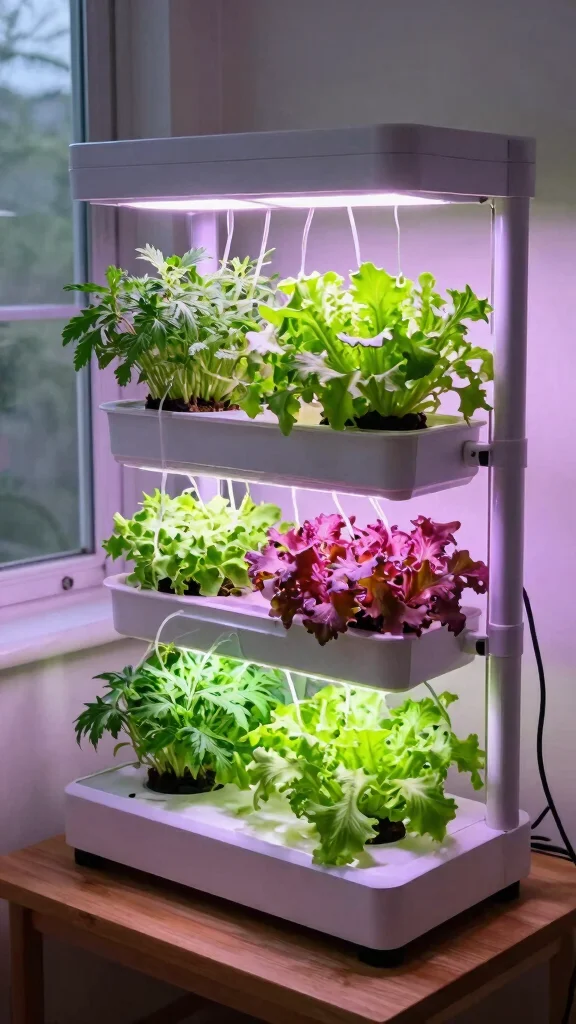
Enhance your indoor gardening with a hydroponic wick system paired with LED lighting. This setup uses energy-efficient lights to provide optimal growth conditions, especially in darker spaces. Position your plants under adjustable LED lights to ensure they receive the necessary spectrum for thriving growth. This combination enables you to grow a wider variety of plants year-round.
When setting up your LED lights, remember to adjust their height to prevent burning and choose the appropriate light spectrum for the best results. Setting a timer can automate the lighting, mimicking natural sunlight patterns.
Key tips for your LED-enhanced system:
– Adjust light height: Prevent burning by keeping a safe distance.
– Select the right spectrum: Use red and blue lights for growth.
– Set a timer: Automate to match natural cycles.
With LED lighting, your indoor garden can thrive, making this setup a fantastic choice for apartment dwellers!
Hydroponic Wick System with LED Lighting
Editor’s Choice
50ft 1/4 inch Plants Self Watering Capillary Wick Rope Cord DIY Vacation…

GooingTop LED Grow Light,6000K Full Spectrum Clip Plant Growing Lamp wit…
7. Hydroponic Wick System for Salad Greens

If fresh salads are your passion, consider a dedicated hydroponic wick system for salad greens. This setup focuses on leafy varieties like lettuce, kale, and arugula that flourish in hydroponic conditions. Use a shallow container as a reservoir filled with nutrient solution, connecting small pots that allow wicks to draw moisture up. This approach guarantees that your greens stay hydrated and ready for easy harvesting.
To keep your salad garden thriving, practice succession planting by sowing seeds weekly for a continuous supply. Rotate your crops regularly to keep things fresh and monitor growth closely, as leafy greens can grow quickly.
Essential tips for growing salad greens:
– Practice succession planting: Ensure a steady harvest.
– Rotate crops: Keep your system diverse and healthy.
– Monitor growth: Trim regularly for optimal health.
This setup allows you to enjoy an abundance of fresh greens, promoting a healthy lifestyle right from your kitchen!
Fun fact: A simple hydroponic wick system diy can grow 4-6 heads of lettuce in a small tray in just 4-6 weeks. With constant moisture and daily harvests, you’ll enjoy fresh greens all season. Pro tip: keep nutrients light and rotate crops for steady salad greens.
You Might Also Like
Hydroponic Wick System for Salad Greens
Editor’s Choice

GENORTH A-Type Hydroponics Growing System Kit for Vegetables,Fruits and …

Liquid Plant Food for use in AeroGarden, IDOO and Hydroponic Growing Sys…
GooingTop LED Grow Light,6000K Full Spectrum Clip Plant Growing Lamp wit…
8. Decorative Hydroponic Wick Centerpiece
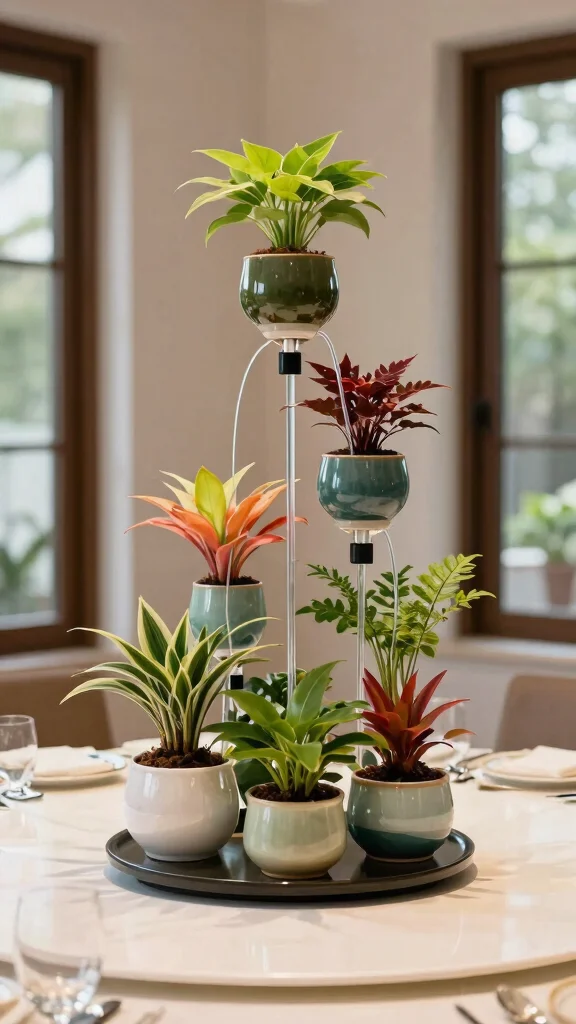
Elevate your indoor gardening with a decorative hydroponic wick centerpiece. This stylish idea combines functionality with aesthetics, using beautiful containers like ceramic pots or glass vases to display your plants. By incorporating a wick system, you can create a stunning focal point in your living room or dining area. Consider using vibrant plants or even flowers to make your centerpiece stand out.
As you design your centerpiece, choose containers that match your home decor and experiment with colorful plants to enhance visual appeal. Layering different textures will add depth and interest to your display.
Tips for crafting your centerpiece:
– Match decor: Select containers that complement your style.
– Use colorful plants: Brighten up your space with blooms.
– Layer textures: Combine various plants for a lush look.
This delightful setup not only beautifies your home but also allows you to enjoy the pleasures of gardening indoors!
Decorative Hydroponic Wick Centerpiece
Editor’s Choice
30 feet 1/5 inch Self Watering Capillary Wicking Hydroponic Wick Cord Va…

Ceramic Modern Glaze Succulent Planter Pot with Drainage Hole and Saucer…
Conclusion
Beginning your hydroponic gardening journey doesn’t have to be complicated or overwhelming.
With these eight DIY ideas for wick systems, you can easily grow delicious herbs and greens in your urban space. Each setup is designed for simplicity and effectiveness, making them perfect for beginners.
So grab your materials, choose your plants, and get started on creating your own thriving hydroponic garden!
Note: We aim to provide accurate product links, but some may occasionally expire or become unavailable. If this happens, please search directly on Amazon for the product or a suitable alternative.
This post contains Amazon affiliate links, meaning we may earn a small commission if you purchase through our links, at no extra cost to you.
Frequently Asked Questions
What is a hydroponic wick system diy and why is it ideal for beginners in urban, small-space gardening?
A hydroponic wick system diy is a simple, passive setup that uses a wick to pull nutrient solution from a reservoir into the growing medium. There’s no pump or electricity required, which makes it incredibly beginner-friendly for urban, small-space gardening. It’s quiet, affordable, and scalable for containers you already have at home.
With wick system benefits like steady moisture delivery and fewer moving parts, it’s a solid entry point into indoor gardening setups and other DIY gardening projects.
What materials do I need to start with a hydroponic wick system diy for indoor gardening setups?
Here’s a practical starter list you can pull from your home stash: a shallow growing container and a reservoir, a wick material (cotton string, rope, or a silicone wick), a net pot or DIY insert, a growing medium (like coco coir or perlite), plants or seeds, and a hydroponic nutrient solution. You’ll also want a way to test or adjust pH and keep the reservoir opaque to prevent algae.
All of these elements come together in a simple DIY gardening project that’s perfect for beginner hydroponics and indoor gardening setups.
How do I set up and maintain a wick system to ensure steady moisture without pumps?
Start by choosing a container and reservoir, then cut a wick long enough to reach from the nutrient in the reservoir up into your growing medium. Thread the wick so its end sits in the nutrient solution and place your plant in the growing medium above. Keep the reservoir filled with a balanced nutrient solution and avoid placing the setup in direct, blazing sun to reduce algae growth.
Check moisture levels regularly and adjust the wick length if the medium stays too wet or dries out too quickly. This is the essence of hydroponic gardening tips for a hydroponic wick system diy.
Which plants thrive in wick systems and what should I avoid for beginner hydroponics?
Wick systems work well with leafy greens and herbs—think lettuce, spinach, kale, basil, cilantro, and mint—plus some microgreens and small herbs. They’re great for compact, low-maintenance setups.
Avoid heavy fruiting crops like large tomatoes or peppers in the very first runs, as their bigger roots and fruit can outpace a simple wick system. Start with 1–2 plants per container to keep the moisture and nutrient delivery easy to manage, and grow from there as you gain confidence in your DIY gardening projects.
What common issues might I encounter with hydroponic wick system diy and how can I troubleshoot quickly?
Common hiccups include uneven moisture (some areas stay wet, others dry), algae growth in clear containers, and nutrient buildup or pH drift. Quick fixes: use an opaque or UV-protected reservoir to prevent algae, adjust wick length to balance moisture, flush and replace nutrient solution if it’s stale or imbalanced, and test pH regularly. If moisture is lacking, ensure the wick actually contacts the reservoir and isn’t fraying. With these tweaks, your indoor gardening setups will stay healthy and productive.
Related Topics
hydroponic wick system
DIY gardening projects
beginner hydroponics
indoor gardening setups
urban gardening
small space gardening
easy hydroponics
wick system benefits
sustainable gardening
home gardening tips
hydroponic tips
container gardening