
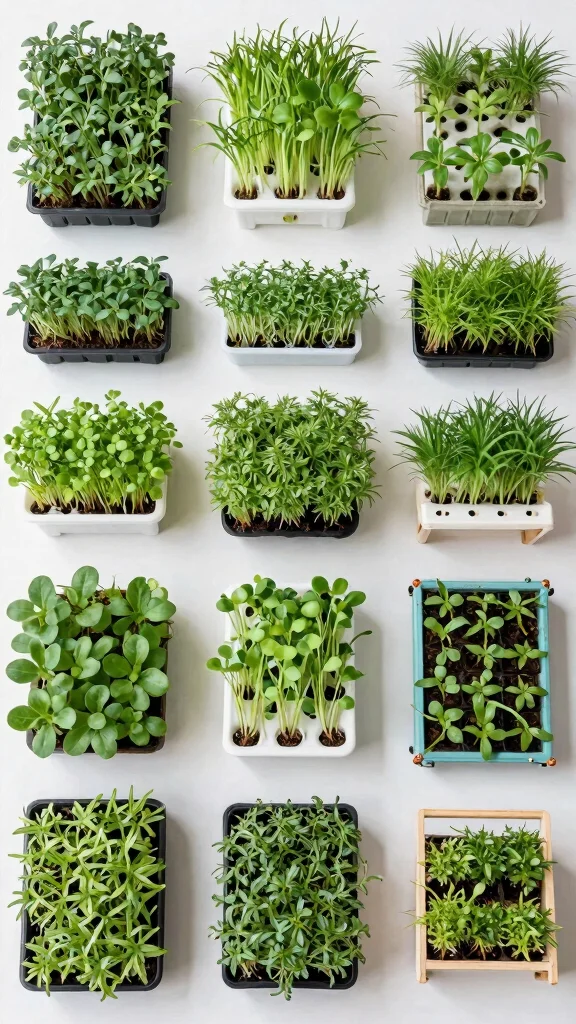
Starting your own garden in the city can feel daunting, especially if you’re limited on space. If you’re craving fresh, nutritious greens but don’t have a backyard, hydroponic microgreens could be your answer. I put this post together to share effective hydroponic microgreens setup ideas that make it easy to enjoy homegrown nutrition, even in the smallest apartments.
This guide is perfect for urban dwellers, busy professionals, or anyone wanting to dive into gardening without needing a lot of outdoor space. If you love the idea of growing your own food but feel overwhelmed, you’re not alone. I’ve gathered seven innovative setups that are simple, efficient, and quick to harvest. You’ll discover how to create vibrant, nutrient-rich microgreens right in your home, no matter how tight your living situation.
By the end of this article, you’ll have several creative setups to choose from, along with practical tips on how to get started. Whether you’re a beginner or someone looking to expand their indoor gardening skills, these ideas will help you grow fresh greens with ease. Plus, you’ll learn about sustainable gardening practices that benefit both you and the planet.
Key Takeaways
– You’ll explore seven unique hydroponic microgreens setups, perfect for small spaces and easy to maintain.
– Each method offers practical hydroponic gardening tips tailored to beginner and experienced gardeners alike.
– Learn about nutrient-rich crops that grow quickly and can be harvested in as little as two weeks.
– Find inspiration for sustainable gardening practices, helping you reduce waste and grow food responsibly.
– These setups cater to various lifestyles, whether you want a DIY project or something ready to use right out of the box.
1. Vertical Hydroponic Tower Systems
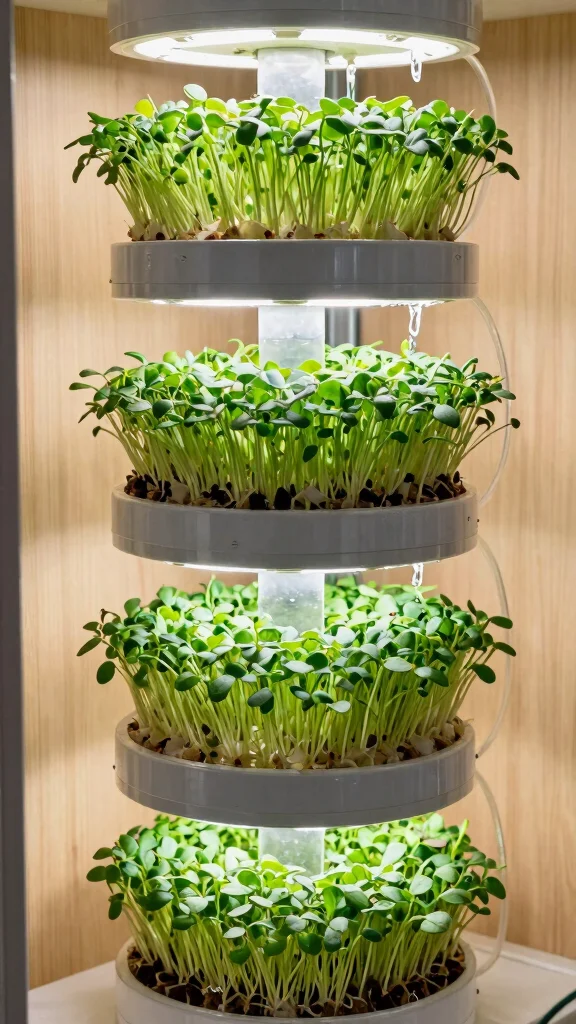
Are you short on space but still want to grow your own microgreens? Vertical hydroponic tower systems are the perfect solution, allowing you to cultivate multiple layers of greens without taking up much room. These towers not only look impressive but also ensure that each tier gets enough light for healthy growth, making them both practical and visually appealing.
To set up your vertical tower, grab a hydroponic tower kit. Fill each tier with a suitable growing medium like coconut coir or rock wool. Use a nutrient-rich solution specifically designed for microgreens to promote healthy growth. Adding a timer for the water pump can help maintain consistent moisture without the risk of overwatering.
Tips for success:
– Select quick-growing varieties like radish or broccoli microgreens.
– Regularly inspect for pests or diseases, as moisture can accumulate in vertical setups.
– Rotate the trays to ensure even growth across all levels.
Consider upcycling old pallet racks for an eco-friendly and personalized tower!
Key Trade-offs & Our Top Pick
Vertical Hydroponic Tower Systems
– Pros: ✔ Space-saving design, ✔ High yield per square foot, ✔ Easy to access for harvesting.
– Cons: ⏱ Higher initial investment, ⏱ Requires more setup time, ⏱ Limited crop variety for some models.
– Best for: Urban gardeners with limited space who want maximum yield from their setup.
Wall-Mounted Hydroponic Systems
– Pros: ✔ Great for small areas, ✔ Aesthetic appeal on walls, ✔ Easy to maintain.[br]
– Cons: ⏱ May require additional lighting, ⏱ Limited to shallow root systems, ⏱ Can be hard to water evenly.
– Best for: Apartment dwellers who want a decorative and functional gardening solution.
Hydroponic Grow Kits for Beginners
– Pros: ✔ User-friendly, ✔ Comes with all necessary materials, ✔ Excellent for learning.
– Cons: ⏱ Limited customization options, ⏱ Might not be the best for larger harvests, ⏱ Can be pricey for small yields.
– Best for: Newcomers to hydroponic gardening who prefer a guided experience.
DIY Hydroponic Systems Using Recycled Materials
– Pros: ✔ Cost-effective, ✔ Customizable to your needs, ✔ Environmentally friendly.
– Cons: ⏱ Time-consuming to set up, ⏱ May require trial and error, ⏱ Less reliability compared to commercial systems.
– Best for: Hands-on individuals who enjoy crafting and want to save money.
Hydroponic Trays on Kitchen Counters
– Pros: ✔ Easily accessible for daily use, ✔ Perfect for small batches, ✔ Simple to care for.
– Cons: ⏱ Limited growing space, ⏱ May need regular cleaning, ⏱ Requires good lighting conditions.
– Best for: Home cooks who want fresh greens at their fingertips.
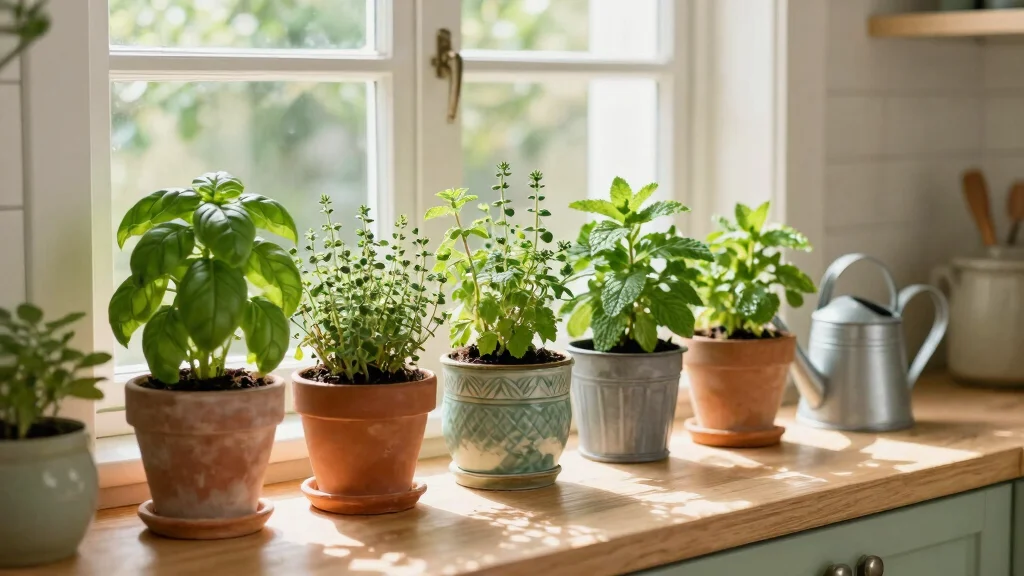
Windowsill Hydroponic Gardens
– Pros: ✔ Natural light source, ✔ Minimal space required, ✔ Attractive display for herbs and microgreens.
– Cons: ⏱ Light and temperature variations can affect growth, ⏱ Limited crop size, ⏱ Seasonal restrictions on some plants.
– Best for: Gardeners who want to utilize sunlight while keeping plants close to cooking spaces.
Community Hydroponic Gardening Spaces
– Pros: ✔ Access to shared resources, ✔ Opportunities for learning from others, ✔ Can grow larger quantities.
– Cons: ⏱ Less control over growing conditions, ⏱ Requires time commitment, ⏱ May need to share the harvest.
– Best for: Those seeking a social experience while cultivating fresh produce.
Best Overall: Vertical Hydroponic Tower Systems
Vertical Hydroponic Tower Systems stand out as the top choice for most people. They offer excellent value for money, especially in urban settings where space is at a premium. With their efficient setup and high yield capabilities, they make growing nutrient-rich crops an accessible endeavor. Their versatility allows you to experiment with different plants while ensuring long-term durability.
Why We Picked This: We recognize that some readers may prefer different options based on their unique needs. If you’re just starting out, a grow kit is perfect for you. For those wanting to save money, a DIY system could be the way to go. Each option has its benefits and drawbacks, and it’s essential to choose the one that fits your lifestyle and growing goals. Whatever you decide, you’ll be well on your way to enjoying fast, nutritious, and easy harvests from your hydroponic microgreens setup!
Vertical Hydroponic Tower Systems
Editor’s Choice

Legigo 1 Inch Rockwool Cubes Seed Starter Plugs for Hydroponics, RockWoo…

2 Pack LED Grow Light Panel 200W Lamp for Indoor Plants, Full Spectrum w…

Just Vertical EVE Tower Garden Hydroponic Indoor Growing System – Grow 1…
2. Wall-Mounted Hydroponic Systems
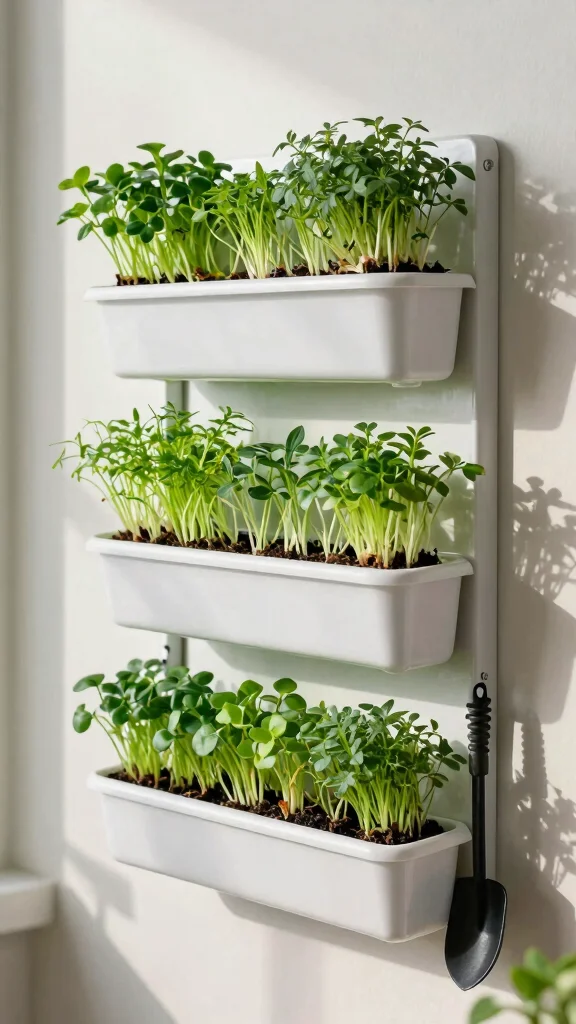
Imagine transforming a plain wall into a vibrant microgreens garden! Wall-mounted hydroponic systems can do just that, using pocket planters that are easy to install and maintain. Perfect for kitchens or living spaces, they provide a splash of green without taking up valuable floor space.
To create your wall-mounted garden, choose vertical planters designed for hydroponics. Make sure they include reservoirs for water and nutrients. Fill each pocket with your desired microgreens, spacing them adequately for airflow. Keep an eye on moisture levels, as these setups can dry out more quickly than traditional gardens.
Gardening tips:
– Add herbs like basil or arugula alongside microgreens for variety.
– Combine grow lights with natural sunlight to support healthy growth.
– Position your garden at eye level for easy enjoyment.
This delightful setup not only serves a purpose but also enhances your home decor sustainably!
❝ Fun fact: A wall-mounted hydroponic microgreens setup can produce fresh greens in 7–14 days, using pocket planters that cling to walls. In small spaces, this saves valuable floor space while delivering a steady harvest you can trust. ❞
📹 Related Video: Build a Hydroponic Grow Wall Inside – Grow Plants Year Round and Save Money!
Wall-Mounted Hydroponic Systems
Editor’s Choice

LBW Desk Grow Light, Full Spectrum Plant Light for Indoor Plants, Grow L…

Liquid Plant Food for use in AeroGarden, IDOO and Hydroponic Growing Sys…

NFT Hydroponics Growing System,36 Pods Wall-Mounted Indoor Garden,Fu…
3. Hydroponic Grow Kits for Beginners

Are you new to gardening and feeling overwhelmed? A hydroponic grow kit can take the stress out of starting your microgreens journey. These all-in-one kits come with everything you need, including trays, nutrient solutions, grow lights, and seeds, making it easy to dive right into the fun of growing.
Select a kit that fits your space and interests, and follow the included instructions closely for the best results. Most kits are designed with user-friendliness in mind, often featuring automated timers for lights and watering to help you maintain a low-maintenance routine.
Why choose a kit?
– Ideal for beginners seeking convenience.
– Many kits allow for quick harvests, often within just 7-14 days.
– They take the guesswork out of nutrient and light needs.
Experiment with various microgreen types for a burst of flavors and nutrients!
Hydroponic Grow Kits for Beginners
Editor’s Choice

GooingTop LED Grow Light,6000K Full Spectrum Clip Plant Growing Lamp wit…

OceanSolution 2-0-3 All Natural Liquid Fertilizer – 32 Oz Concentrated…
4. DIY Hydroponic Systems Using Recycled Materials
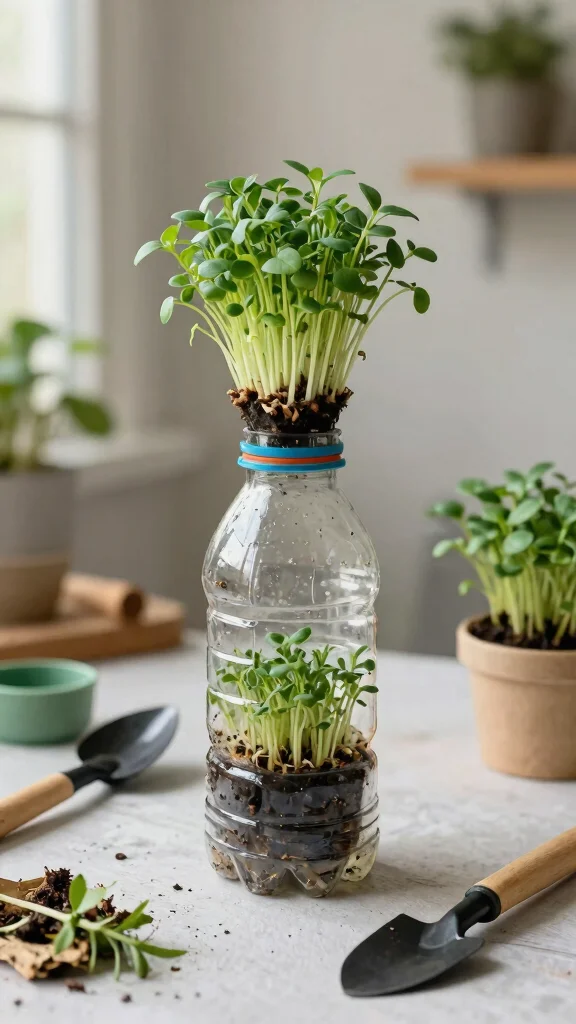
Feeling crafty and eco-conscious? Creating a DIY hydroponic system from recycled materials is a fantastic way to grow microgreens while being kind to the planet. You can use items like old plastic bottles, PVC pipes, or wooden crates to build a unique garden that reflects your personal style.
To make a simple system, cut a plastic bottle in half to create a reservoir and a growing chamber. Fill the chamber with a growing medium, plant your microgreen seeds, and use a wick system to draw nutrients from the reservoir. Alternatively, repurpose PVC pipes for a nutrient film technique (NFT) setup that circulates a thin film of nutrients over the roots.
Pro tips:
– Ensure all materials are clean and safe for growing food.
– Regularly monitor water levels and nutrient strengths.
– Let your creativity shine; the design possibilities are limitless!
This hands-on project not only yields fresh greens but also boosts your DIY skills, making it a rewarding experience!
You might also like

DIY Hydroponic Systems Using Recycled Materials
Editor’s Choice

0 Gauge Amp Wiring Kit,3000 Watt Amplifier Sub Installation Kit Make Con…

2LBS Leca Expanded Clay Pebbles Hydroponics Supplies for Indoor Garden P…
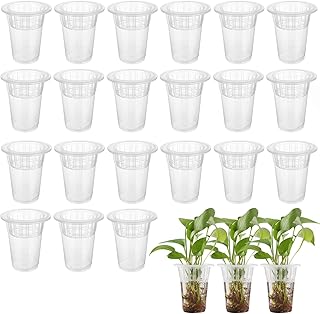
50 Pack Plastic Nursery Pots for Plants Terrarium Plant Propagation Stat…
5. Hydroponic Trays on Kitchen Counters

Looking for a way to have fresh microgreens at your fingertips while cooking? Hydroponic trays on your kitchen counter are an excellent solution. They provide easy access to fresh greens, adding a burst of life and color to your kitchen decor.
Choose shallow trays designed specifically for microgreens, ensuring they have proper drainage. After preparing the trays with a suitable growing medium, evenly sprinkle your seeds. A light mist or gentle watering will help keep them moist as they begin to grow.
Key benefits:
– Easy harvesting; just snip off what you need!
– Adds vibrancy to your kitchen space.
– Supports nutritious and sustainable cooking.
Rotate different varieties to keep your greens fresh and exciting throughout the year!
Fun fact: A compact hydroponic microgreens setup on your kitchen counter can yield fresh greens in as little as 7–10 days. All you need is a shallow tray, proper drainage, and a light mist.
Hydroponic Trays on Kitchen Counters
Editor’s Choice

Legigo 5 Pack Seed Sprouter Trays with Lids- Soil-Free Cultivation Germi…

Spray Bottle for Plants 2 Pack, 16oz – Ultra Fine Mist, Plant Mister Emp…

Seedboy Organic Non-GMO Sprouting Seeds, Fresh Salad Blend – USA Grown M…
6. Windowsill Hydroponic Gardens

Are you underutilizing your windowsill? This space can be transformed into a thriving microgreens garden, taking advantage of natural sunlight for cheerful growth. Setting up a windowsill garden optimizes your space, beautifies your home, and provides quick access to fresh greens.
Start with narrow trays or planter boxes that fit comfortably on your windowsill. Fill them with a light growing medium and evenly distribute your microgreen seeds. Water them consistently, ensuring they receive adequate sunlight throughout the day.
Why this setup works:
– Natural sunlight encourages rapid growth and vibrant color.
– Personalizes your space with greenery.
– Easily accessible for cooking and garnishing.
Consider placing reflective materials behind the trays to maximize light absorption for even better growth!
Fun fact: a compact Windowsill hydroponic microgreens setup can yield fresh greens in as little as 7–10 days. With narrow trays and a simple growing medium, you can harvest multiple rounds each month, right where you live.
You Might Also Like

Windowsill Hydroponic Gardens
Editor’s Choice
GooingTop LED Grow Light,6000K Full Spectrum Clip Plant Growing Lamp wit…

Ahopegarden 52PCS Hydroponics Pods Kit: Compatible with Aerogarden, Incl…

Vuwez Plant Saucer Tray, Heavy Sturdy Long Narrow Plastic Plant Saucers …
7. Community Hydroponic Gardening Spaces

Want to connect with fellow urban gardeners while growing nutritious microgreens? Joining a community hydroponic gardening space can be a rewarding experience. These shared areas often provide the resources and equipment necessary to cultivate a variety of crops, making them an excellent choice for those without personal gardening space.
Community gardens give you access to larger hydroponic systems that might not be practical for individual use. Plus, you’ll gain valuable hydroponic gardening tips from experienced members, enhancing your knowledge of sustainable practices.
Benefits of community gardening:
– Build a network of friends and gardening mentors.
– Share tools and resources, reducing costs.
– Participate in community events and workshops focused on sustainable gardening.
This collaboration enriches your personal gardening journey while fostering a sense of community and environmental responsibility!
Community Hydroponic Gardening Spaces
Editor’s Choice
OceanSolution 2-0-3 All Natural Liquid Fertilizer – 32 Oz Concentrated…
GooingTop LED Grow Light,6000K Full Spectrum Clip Plant Growing Lamp wit…

Ahopegarden Indoor Garden Hydroponics Growing System: 10 Pods Plant Germ…
Conclusion
Hydroponic microgreens setups offer a fantastic way to grow nutritious greens in urban spaces, regardless of how small your living environment might be. Embracing these innovative methods not only supports a healthier lifestyle but also contributes to sustainable gardening practices. Whether you choose to start small with kitchen counters or explore creative DIY methods, the joy of watching your microgreens flourish is immense. Dive into the world of hydroponics, and let your indoor garden flourish with these vibrant, nutrient-rich crops!
Note: We aim to provide accurate product links, but some may occasionally expire or become unavailable. If this happens, please search directly on Amazon for the product or a suitable alternative.
This post contains Amazon affiliate links, meaning we may earn a small commission if you purchase through our links, at no extra cost to you.
Frequently Asked Questions
What is a hydroponic microgreens setup and why is it great for small urban spaces?
A hydroponic microgreens setup is a soil-free growing system that uses a nutrient-rich solution to feed tiny greens indoors. It’s ideal for small urban spaces because you can stack compact trays on vertical racks and use energy-efficient LED lights to maximize yield in a limited footprint. To start, choose a setup style (wick, nutrient film technique, or simple top-fed drip), pick a sunny or well-lit corner, and establish a timer for lighting and feeding. Aim for a comfortable room temperature and a pH of around 5.5–6.5 to keep your nutrient-rich crops thriving while keeping the process straightforward and sustainable.
Which microgreens are the easiest and fastest to grow in a hydroponic setup for beginners?
If you’re new to hydroponic gardening tips, start with radish, broccoli, and pea shoots, which typically harvest in about 7–14 days. Sunflower greens and kale can also be very forgiving and quick with steady lighting. These varieties are well-suited to compact trays and simple nutrient solutions, helping you see fast, tasty results and building confidence for bigger or more complex microgreens grows on a small urban hydroponic microgreens setup.
How can I optimize a small-space hydroponic microgreens setup on a budget?
Maximize space and minimize cost with a modular 2–3 tier rack, inexpensive LED grow lights, and DIY trays or repurposed containers. Use a basic timer for light cycles, a simple reservoir with a pre-mixed leafy greens nutrient solution, and keep the system clean to avoid algae. Reuse sturdy trays, repurpose scavenged shelving, and gradually add varieties as you grow. With these steps you’ll have an easy indoor gardening approach that fits tight spaces and still delivers high yields and nutrient-dense greens.
What are the best practices for nutrient management and pH in a hydroponic microgreens setup?
Keep things simple: target a pH of about 5.5–6.5 and use a complete leafy greens nutrient solution appropriate for hydroponic microgreens. Start light and monitor EC or TDS to avoid nutrient burn, then adjust gradually. Feed every 1–3 days depending on your system and plants, and always start with clean, fresh water. Regularly check the solution for clarity, and keep everything in a clean, sanitary state to support nutrient-rich crops and sustainable gardening practices.
How do I harvest, rinse, and store microgreens to preserve nutrients and flavor?
Harvest when the first true leaves appear for the best flavor and texture. Use clean scissors to cut just above the roots or growing medium, then gently rinse the greens under cool water. Dry thoroughly with a salad spinner or air dry, then store in a breathable container in the fridge for up to 3–7 days. For maximum freshness, keep them away from excessive moisture and consider trimming and freezing or dehydrating any excess for later use. This keeps your easy indoor gardening harvests vibrant and nutritious for as long as possible.
Related Topics
hydroponic microgreens
urban gardening
small space gardening
easy indoor gardening
nutrient-rich crops
sustainable practices
beginner friendly
quick harvests
microgreens methods
hydroponic setup
fast growing plants
indoor gardening tips