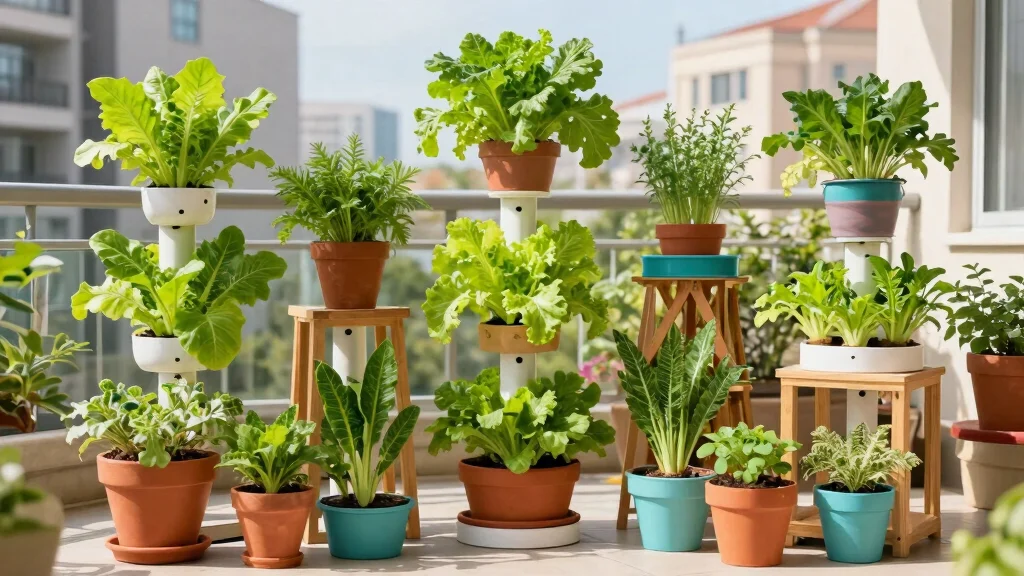
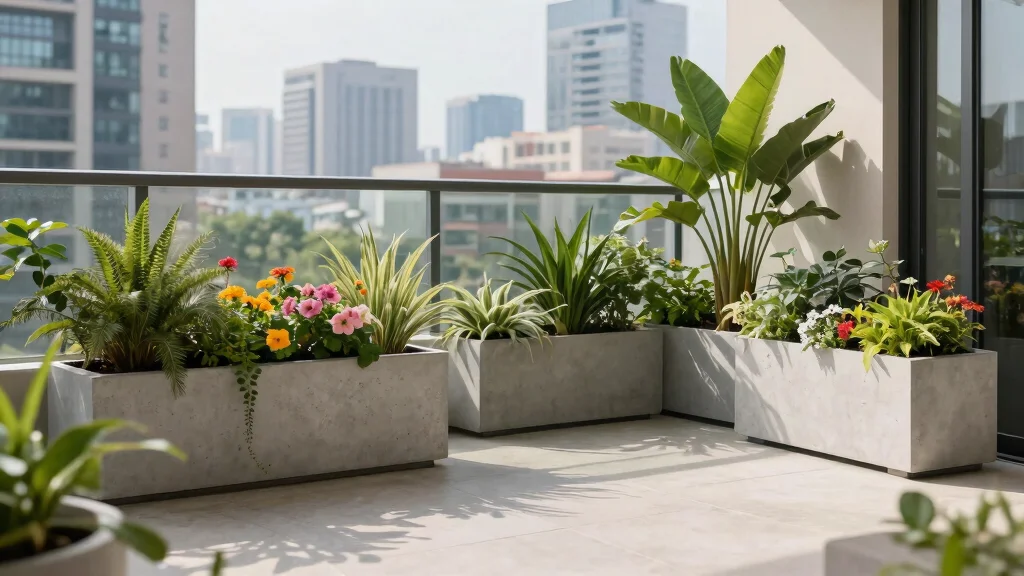
Growing your own vegetables can be a rewarding experience. But if you’re short on space or just looking for a fun project, traditional gardening might not fit the bill. That’s why I created this guide on DIY hydroponic towers. With these systems, you can grow fresh produce right in your home or backyard, even in small urban settings.
If you’re passionate about gardening and want to produce healthy vegetables, this post is just for you. Whether you’re a seasoned gardener or a newbie, these ideas cater to all skill levels and budgets. You’ll discover how to create vertical gardens that maximize your space and resources, allowing you to cultivate everything from leafy greens to vibrant herbs.
In this guide, I’ve compiled 9 budget-friendly DIY hydroponic tower ideas that you can easily implement. From using simple materials like PVC pipes to repurposing plastic bottles, these options are not only creative but also practical. By the end of this post, you’ll have the knowledge and inspiration to kickstart your urban gardening adventure and enjoy the benefits of growing your own food right at home.
Key Takeaways
– Affordable Options: Discover budget-friendly DIY hydroponic towers that won’t break the bank, allowing you to start gardening without hefty costs.
– Space-Saving Solutions: Learn how vertical gardens can maximize your growing space, making them perfect for apartments or small yards.
– Material Variety: Explore different materials for building your hydroponic systems, including PVC, wood, and recycled items, each offering unique benefits.
– Simple Steps: Follow straightforward instructions for each tower design, making it easy for anyone to build and maintain their own hydroponic garden.
– Sustainable Gardening: Understand how these systems promote sustainable practices by using fewer resources and encouraging urban gardening initiatives.
1. PVC Pipe Hydroponic Tower
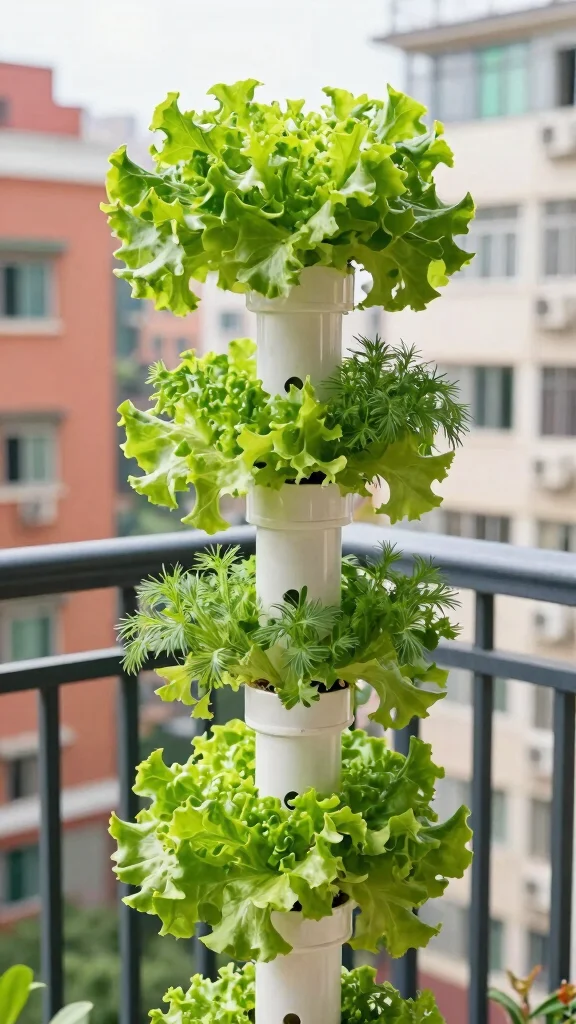
Got a craving for fresh veggies right at home? A PVC pipe hydroponic tower is a clever and budget-friendly way to grow your favorites. These towers are easy to customize; just cut the pipes to the length you like, drill holes for your plants, and stack them up! Use a bucket to hold the nutrient solution, providing your plants with everything they need. Lettuce, kale, and herbs like basil shine in this setup, bringing a burst of freshness to your meals.
Ingredients:
– PVC pipes, cut to desired lengths
– Drill for creating holes
– A bucket for nutrient solution
– Hydroponic nutrients
– Seeds or seedlings of your choice
Instructions:
1. Cut PVC pipes to your preferred height.
2. Drill holes in the pipes for planting.
3. Stack the pipes vertically in a stable position.
4. Fill the bottom bucket with nutrient solution.
5. Plant your chosen seeds or seedlings in the holes.
6. Monitor water levels and nutrient concentration regularly.
7. Enjoy your home-grown veggies!
FAQs:
– Can I use different pipe sizes? Absolutely! Mixing sizes can create a unique design.
– Can I grow flowers? Yes, many edible flowers can thrive in this setup!
📹 Related Video: How to Build Vertical hydroponic Grow Tower using PVC 4″ || hydroponic system || Aeroponic system
PVC Pipe Hydroponic Tower
Editor’s Choice

6Pcs 1/2 Inch PVC Pipe 17″ Long Sch40 Industrial Pipes for Home DIY, Gre…

KATA 8PCS Hole Saw Kit 1″ to 2-1/8″(25-54mm) Hole Saw Set in Case with M…

Liquid Plant Food for use in AeroGarden, IDOO and Hydroponic Growing Sys…
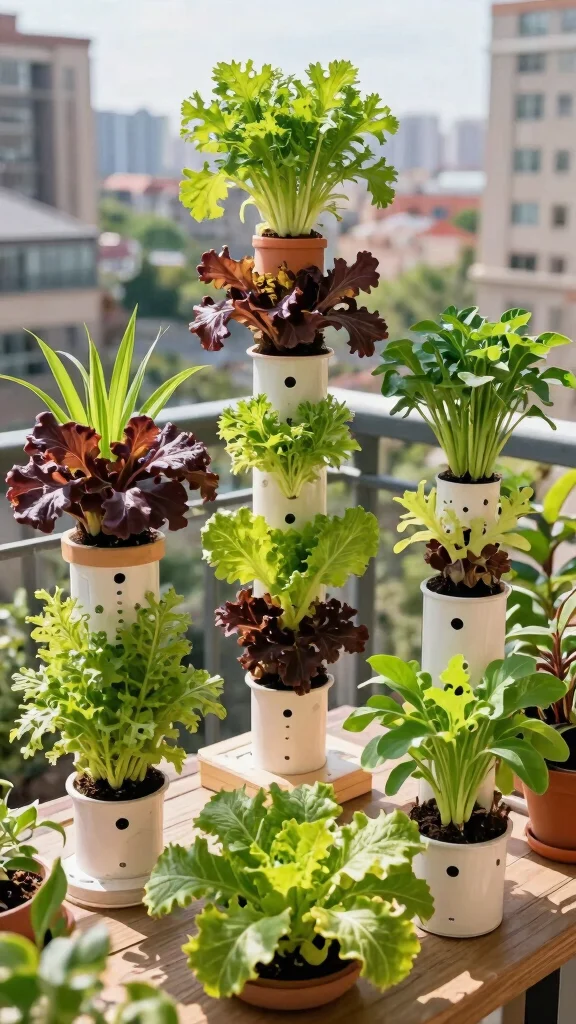
2. Stacked Plastic Containers
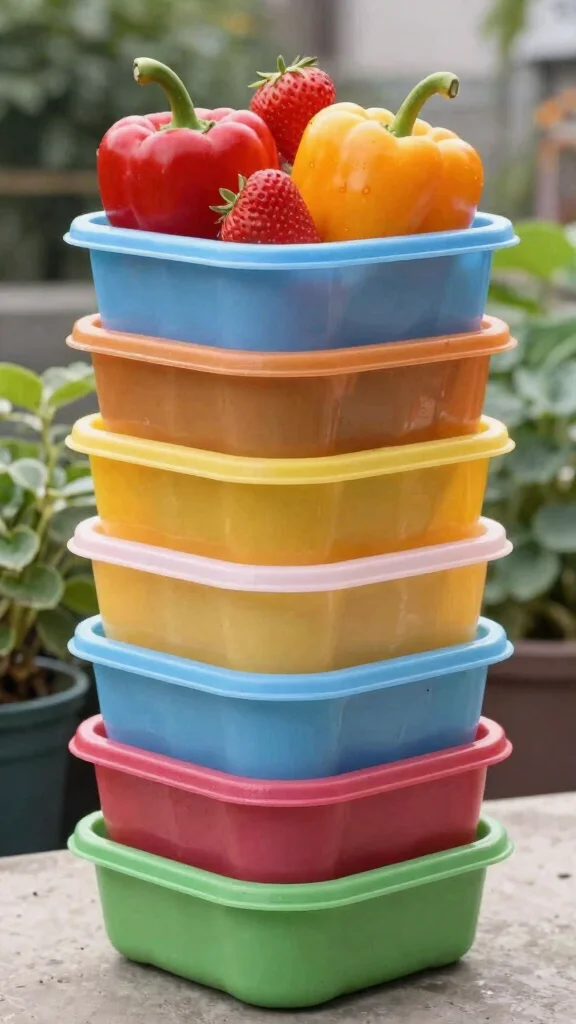
Looking for a fun way to garden vertically? Stacked plastic containers can transform your space into a charming vertical garden. By arranging containers of varying sizes, you can create an eye-catching tower. Each container can be filled with soil or a hydroponic medium, making it simple to grow your favorite veggies. This method saves space and offers easy access to your plants. Try growing strawberries, peppers, or herbs for a colorful and functional garden!
Ingredients:
– Various sizes of plastic containers
– Potting soil or hydroponic medium
– A tray for excess water
– Optional paint for decoration
Instructions:
1. Stack the containers in a stable arrangement.
2. Fill each container with your chosen medium.
3. Plant your seeds or seedlings in each container.
4. Ensure drainage holes are in place and add a tray below for runoff.
5. Water and watch your garden flourish!
FAQs:
– Can I use any type of plastic container? Yes, just ensure they’re clean and safe for planting.
– Can I make it decorative? Of course! Paint the containers for a personal touch.
Small-space gardeners love this: a 3-tier plastic container stack can yield a full harvest in as little as 8 square feet. With diy hydroponic tower setups, you plant strawberries, peppers, and herbs and still keep access handy. It’s simple, compact, and surprisingly productive.
Stacked Plastic Containers
Editor’s Choice

Legigo 1 Inch Rockwool Cubes Seed Starter Plugs for Hydroponics, RockWoo…

Solar Drip Irrigation System with USB Charging, 49FT Outdoor Indoor Plan…

GameXcel Vertical Planter Tower – 5 Tier Stackable Garden Planters with …
3. Wooden Pallet Hydroponic Tower
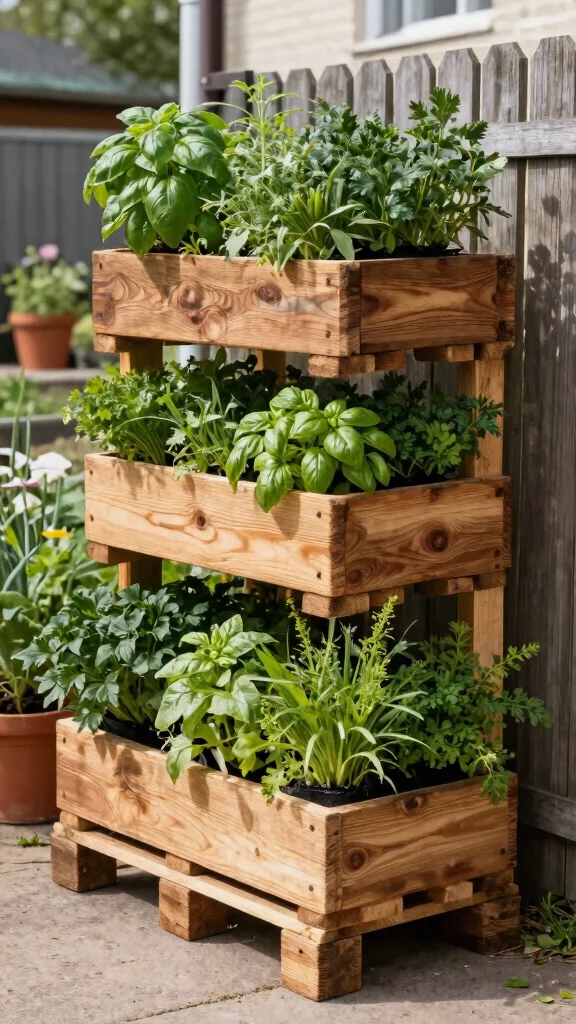
Want a garden that’s charming and eco-friendly? A wooden pallet hydroponic tower is a fantastic way to grow veggies sustainably! Simply lean a pallet against a wall or fence, fill it with soil, and plant away. This design promotes excellent drainage and airflow, keeping your plants healthy. Ideal for herbs, salad greens, or small fruits, it looks great in any outdoor space!
Ingredients:
– Untreated wooden pallet
– Landscape fabric
– Soil or hydroponic medium
– Seeds or seedlings of your choice
Instructions:
1. Lean the pallet against a sturdy surface.
2. Line the back with landscape fabric to hold soil.
3. Fill the pallet with soil or growing medium.
4. Plant your seeds or seedlings in each section.
5. Water and watch them grow!
FAQs:
– Can I use a treated pallet? No, treated wood can leach harmful chemicals.
– Can I grow larger plants? Consider using a sturdier pallet for bigger crops.
Space is tight, but your garden doesn’t have to be. This DIY hydroponic tower—wooden pallet style—fits against any wall, so you can plant herbs or greens with great drainage and airflow.
Wooden Pallet Hydroponic Tower
Editor’s Choice

Pallet Board Co. – 20 Sq. Ft. Bundle of Reclaimed Pallet Boards – Nail U…

3ftx50ft Weed Barrier Landscape Fabric Heavy Duty,Weed Block Gardening…
4. Hanging Hydroponic Garden

Craving creative gardening solutions? A hanging hydroponic garden is perfect for utilizing vertical space! Use hanging pots or net cups to grow your veggies high off the ground. Attach your setup to a balcony railing or a strong hook for an elegant garden display. With easy access to sunlight and air, this design works wonders for herbs and small leafy plants.
Ingredients:
– Hanging pots or net cups
– Hydroponic nutrients
– A sturdy hook or railing
– Seeds or seedlings of your choice
Instructions:
1. Fill hanging pots with a hydroponic medium.
2. Attach pots securely to the railing or hook.
3. Plant your seeds or seedlings in the pots.
4. Regularly check water and nutrient levels.
5. Enjoy your beautiful hanging garden!
FAQs:
– Can I grow larger plants? Smaller plants work best in this setup.
– Can I use any type of pot? Ensure they have good drainage for optimal growth.
Hanging Hydroponic Garden
Editor’s Choice
Liquid Plant Food for use in AeroGarden, IDOO and Hydroponic Growing Sys…

12 Pack 3 inch Net Cups Pots with 12 feet Hydroponics Self Watering Wick…
![[HIGH-WORKLOAD] 200Lbs 4 Pcs Q-Hanger Hooks M8 with Washer & Safety Buck...](https://m.media-amazon.com/images/I/81XPpysgi9L._AC_UL320_.jpg)
[HIGH-WORKLOAD] 200Lbs 4 Pcs Q-Hanger Hooks M8 with Washer & Safety Buck…
5. Recycled Bottles Hydroponic Tower

Have some old plastic bottles lying around? Turn them into a creative hydroponic tower that’s both eco-friendly and budget-smart! Cut the bottles in half, fill them with a growing medium, and stack them to create a vertical garden. This lightweight design is great for small spaces and allows you to grow a variety of plants.
Ingredients:
– Recycled plastic bottles
– Hydroponic medium
– A sturdy frame or stand
– Seeds or seedlings of your choice
Instructions:
1. Cut the bottles in half and clean them out.
2. Attach the bottles to a sturdy framework.
3. Fill each bottle with the growing medium.
4. Plant your seeds or seedlings in each bottle.
5. Water and monitor growth.
FAQs:
– Can I use any bottle size? Yes, a mix of sizes adds visual interest.
– Can I grow herbs? Definitely! They thrive in this setup.
You might also like

Difficulty Rating & Requirements
Overall Difficulty Rating: Medium
Creating a DIY hydroponic tower is a manageable but slightly challenging project. It suits those who have some experience with basic tools and gardening but is also friendly enough for enthusiastic beginners willing to learn. You’ll be constructing a system that requires attention to detail and an understanding of plant care, which makes it rewarding yet requires a bit of patience.
Time Estimate:
⏱ Estimated time: 4-8 hours, depending on the design you choose and your familiarity with the materials.
Here’s a breakdown of the major phases:
– Planning and Design: 1-2 hours to sketch ideas and gather materials.
– Construction: 2-4 hours based on the complexity of your hydroponic tower.
– Setup and Planting: 1-2 hours to install the system and plant your seeds or seedlings.
Skill Requirements:
– Required skills: Basic carpentry skills, familiarity with tools like drills and saws, and some gardening knowledge.
– Beginner-friendly: Yes, with some guidance and a willingness to learn. Even if you’re new, you can pick up the necessary skills throughout the process.
– Skills that can be learned: Simple construction techniques and hydroponic principles are easily learned through online resources or tutorials.
– Skills requiring experience: Handling tools and understanding plant care will be easier if you have some prior experience, but it’s not mandatory.
Tools & Materials Needed:
🧰 Essential items checklist:
– PVC pipes or plastic containers: Required for the structure.
– Drill: Required for making holes in the containers for planting.
– Water pump: Required if your design needs it for nutrient circulation.
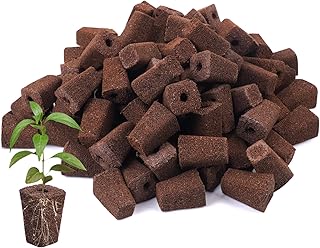
– Growing medium (like rock wool or clay pellets): Required for plant support.
– Nutrient solution: Required to feed your plants.
– Tubing: Optional for water transport, depending on your design.
– Paint (if using wood): Optional for aesthetics and preservation.
– Seeds or seedlings: Required for your hydroponic garden.
Step-by-Step Overview:
1. Planning and Designing: Spend time deciding on the type and height of your tower. Sketch your ideas and make a list of materials. (1-2 hours)
2. Building the Structure: Cut your pipes or containers to size and assemble them. Ensure everything is secure. (2-4 hours)
3. Setting Up the Hydroponic System: Install the water pump and tubing if needed, and fill your system with the nutrient solution. (1-2 hours)
4. Planting: Add your growing medium and plant your seeds. Make sure they’re well-positioned to receive light. (1 hour)
Professional vs DIY:
Professional systems can cost anywhere from $200 to $1,000, depending on the complexity and efficiency. On the other hand, a DIY hydroponic tower can be built for as little as $50 or up to $150, depending on the materials you choose. If you’re comfortable with basic tools and DIY projects, building your hydroponic tower can be a fulfilling way to save money and learn about urban gardening. If you lack the time or tools, hiring a professional might be the way to go.
Recycled Bottles Hydroponic Tower
Editor’s Choice

Set of 43 Assorted Vegetable & Herb Seed Packets – Over 10,000 Seeds! – …

Planting Mix for Plant Propagation (4 Quarts), Hand Blended Soilless Mix…
6. Vertical Wooden Planter Box

Are you looking for a stylish way to garden? A vertical wooden planter box can be an elegant solution for hydroponic gardening. Build your planter with multiple levels, allowing for vertical growth. Fill each section with a hydroponic medium and add your favorite veggies for a beautiful display.
Ingredients:
– Untreated wood for the planter
– Hydroponic medium
– Seeds or seedlings of your choice
– A drip irrigation system (optional)
Instructions:
1. Construct your planter box with multiple compartments.
2. Fill each section with the growing medium.
3. Plant your seeds or seedlings.
4. Set up a drip irrigation system for easy watering.
5. Monitor growth and enjoy your harvest!
FAQs:
– Can I personalize the design? Absolutely! Make it fit your style.
– Can I grow various vegetables? Yes, it’s perfect for a variety of crops!
Vertical Wooden Planter Box
Editor’s Choice
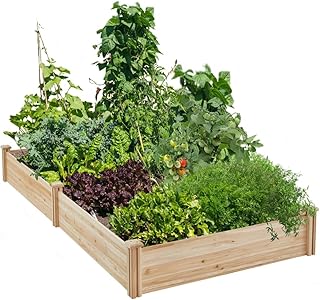
Yaheetech 8×4ft Wooden Horticulture Raised Garden Bed Divisible Elevate…
100 Pack Grow Sponges, Replacement Root Growth Sponges Seed Pods,Seed St…

MIXC 230FT Quick-Connect Drip Irrigation System Kit, Automatic Garden Wa…
7. Vertical Hydroponic Gutter System
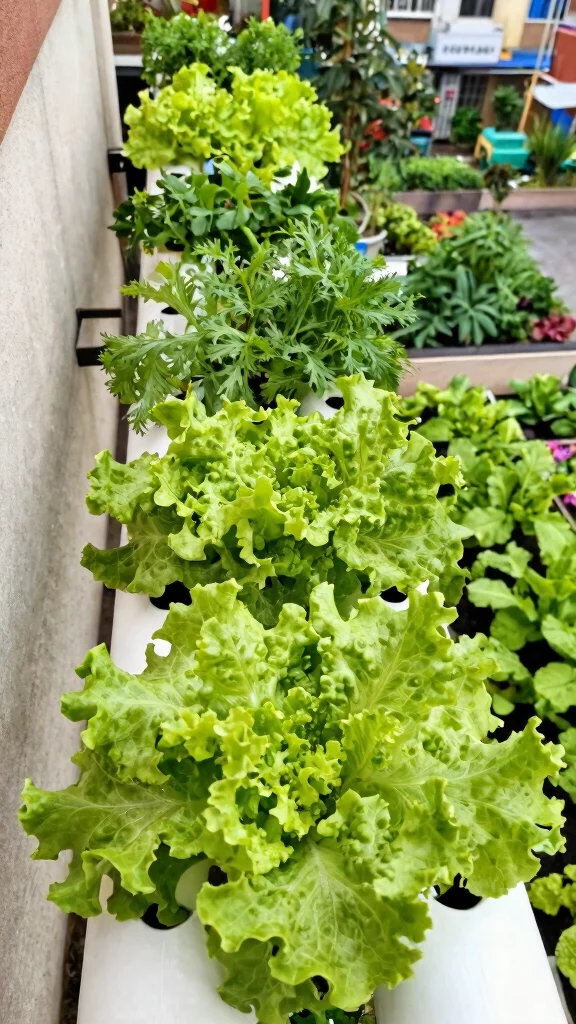
Want a unique way to garden? Transforming rain gutters into a vertical hydroponic system is a clever idea! Cut the gutter into sections, mount them vertically, and plant in the channels. This system ensures excellent drainage and air circulation, making it efficient for growing leafy greens and herbs.
Ingredients:
– PVC or metal rain gutters
– Non-toxic sealant
– Hydroponic medium
– Seeds or seedlings of your choice
Instructions:
1. Cut the gutters into sections and mount them.
2. Seal the joints with non-toxic sealant.
3. Fill the gutters with the growing medium.
4. Plant your seeds or seedlings.
5. Water regularly and watch them grow!
FAQs:
– Can I use this system for larger plants? It’s best for smaller, leafier plants.
– Can I recirculate water? Yes, adding a pump is a great idea!
Fun fact: a vertical gutter system can double leafy greens per square foot compared with traditional pots. With a diy hydroponic tower setup, you can stack sections for a compact balcony and harvest fresh herbs in weeks, not months.
Vertical Hydroponic Gutter System
Editor’s Choice
Planting Mix for Plant Propagation (4 Quarts), Hand Blended Soilless Mix…

2 Pack Rain Gutter Downspout Extensions Flexible,Drain Downspout Extende…

Garden Box Sealer | FDA Food Contact Safe Plant-Based Wood Sealant for R…
8. DIY Hydroponic Tote Bag Garden

Looking for a fun twist on gardening? Using tote bags for vertical gardening is a creative and practical solution! Fill the bags with a growing medium, hang them from a wall or fence, and plant herbs or small veggies for a vibrant garden. This method is lightweight and easy to move, making it perfect for tight spaces.
Ingredients:
– Sturdy tote bags
– Hydroponic medium
– Seeds or seedlings of your choice
– A wall or fence for hanging
Instructions:
1. Fill each tote bag with the growing medium.
2. Hang the bags on a wall or fence securely.
3. Plant your seeds or seedlings in each bag.
4. Water and enjoy a colorful garden!
FAQs:
– Can I use any tote bag? Ensure they’re durable and breathable.
– Can I grow larger plants? This setup is best for smaller plants and herbs.
You Might Also Like

DIY Hydroponic Tote Bag Garden
Editor’s Choice
100 Pack Grow Sponges, Replacement Root Growth Sponges Seed Pods,Seed St…

HOME GROWN Herb Seeds for Planting 15-Pack Massive Seed Count 4,300+ See…

9. Concrete Block Hydroponic Tower
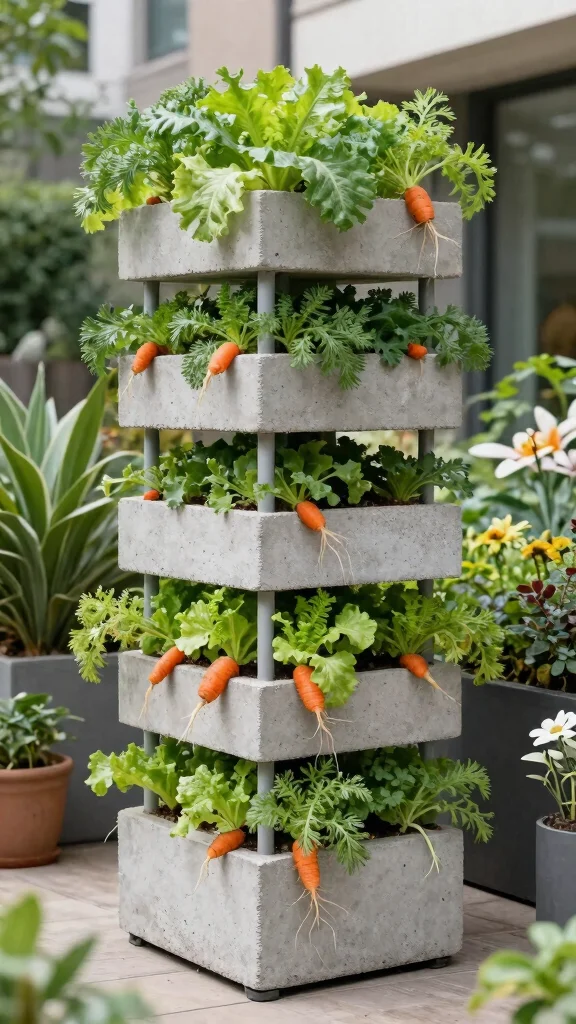
Want a sturdy, stylish garden solution? Using concrete blocks for a hydroponic tower creates a solid structure for growing veggies. Stack the blocks and fill their cavities with a growing medium, allowing you to plant a range of vegetables. This design is not only functional but adds a modern touch to your garden.
Ingredients:
– Concrete blocks
– Growing medium
– Seeds or seedlings of your choice
Instructions:
1. Stack the concrete blocks to your desired height.
2. Fill the cavities with the growing medium.
3. Plant your seeds or seedlings in the blocks.
4. Water regularly and enjoy fresh veggies!
FAQs:
– Can I customize the height? Absolutely! Make it fit your space.
– Can I grow deep-rooted vegetables? Yes, it’s great for carrots and radishes!
Concrete Block Hydroponic Tower
Editor’s Choice

Legigo 10 LB Organic Leca Clay Pebbles for Plants, 4mm-16mm 100% Natural…
Beuta Faux Stone Starter Block – 7″ L x 4″ W x 6.5″ H – DIY Dig-Free…

Herb Seedlings: Ready-to-Plant Seedlings, Starts, Plugs, Garden-Ready, L…
Conclusion
Embracing the DIY hydroponic tower trend is not only a fantastic way to maximize your growing potential in limited spaces but also a fun and creative journey! Whether you choose to use recycled materials or build a stylish wooden structure, the possibilities are endless. By incorporating these vertical gardening ideas into your urban gardening space, you’ll enjoy fresh vegetables and herbs right at your fingertips. Dive into your next project today and watch your small space flourish with greenery!
Note: We aim to provide accurate product links, but some may occasionally expire or become unavailable. If this happens, please search directly on Amazon for the product or a suitable alternative.
This post contains Amazon affiliate links, meaning we may earn a small commission if you purchase through our links, at no extra cost to you.
Frequently Asked Questions
What exactly is a diy hydroponic tower and why is it great for urban gardening?
Think of a diy hydroponic tower as a vertical, soil-free garden that stacks plants in tiers and feeds them with a nutrient solution.
It’s ideal for urban gardening because you gain a lot of growing space without expanding the footprint, perfect for balconies, patios, or even a sunny kitchen corner.
With a few budget-friendly components you can grow leafy greens, herbs, and compact vegetables using hydroponic systems and vertical gardening techniques.
Start small and scale up as you learn light, water, and nutrient needs.
What materials do I need to build a budget-friendly diy hydroponic tower?
To build a budget-friendly diy hydroponic tower, you can repurpose containers, PVC, or a simple store-bought frame.
Essentials include a reservoir, a small water pump, tubing or a wick, net pots, a growing medium, and a nutrient solution.
For a starter setup, look for thrifted buckets or sturdy barrels to create tiers—this keeps your budget-friendly gardening goals on track while staying compatible with hydroponic systems.
If you’re growing indoors, add a grow light and a simple pH/EC tester to keep plants thriving.
Which vegetables grow best in a diy hydroponic tower?
Leafy greens like lettuce, spinach, and kale do exceptionally well in a diy hydroponic tower, as do herbs such as basil and parsley.
For compact vegetables, try cherry tomatoes, compact peppers, and radishes that don’t need deep roots.
Choose fast-growing, bushy varieties and stagger plantings so you maximize the vertical space in your vertical gardening setup.
This approach fits neatly into any container gardening and urban gardening plan.
How do I set up, maintain, and troubleshoot a diy hydroponic tower?
Plan your tower placement with adequate light (sun or grow lights), assemble the tiers, and connect the reservoir to the pump.
Then monitor pH (generally around 5.8–6.5 for greens) and nutrient strength, topping up as plants grow.
If leaves yellow, check nutrient balance or root health; if roots look slimy, clean the reservoir and improve aeration.
Regular maintenance includes cleaning net pots, trimming algae, and flushing the system every few weeks to prevent clogs and disease.
Can I scale or customize a diy hydroponic tower for different budgets and spaces?
Absolutely. Start with a small single-tower made from repurposed containers, and then add more tiers or modules as space and budget allow.
You can mix low-cost materials like PVC frames with off-the-shelf components when you’re ready, or opt for a fully DIY build if you love tinkering.
The beauty of vertical gardening is that you tailor your urban gardening setup to fit your space, budget-friendly gardening goals, and crops.
Related Topics
diy hydroponic tower
vertical gardening
urban gardening
container gardening
budget-friendly gardening
small space gardening
beginner friendly
easy hydroponics
hydroponic systems
home gardening
sustainable gardening
green living