
If you’ve ever sliced open an avocado and found yourself staring at its large, glossy seed, you might have wondered if you could grow something beautiful from it. This post is for all of you who crave a touch of greenery in your kitchen or living space. Indoor gardening has skyrocketed in popularity, and what better way to join the trend than by cultivating an avocado seed? It’s not just a fun project; it’s a step toward sustainable gardening, too.
Whether you’re new to gardening or a seasoned green thumb, you’ll find practical tips that make avocado seed growing easier. You’ll learn how to transform that kitchen scrap into a thriving plant that not only beautifies your home but also provides a sense of accomplishment. From selecting the right seeds to caring for your avocado plant as it grows, I’ve pulled together ten essential tips that are simple, satisfying, and perfect for any indoor gardening enthusiast.
By following these tips, you will create an inviting atmosphere in your home while making the most of your kitchen scraps. Plus, you might even get to enjoy the fruits of your labor in the future! Let’s dive into the world of avocado seed cultivation and discover how you can grow your own indoor avocado plant.
Key Takeaways
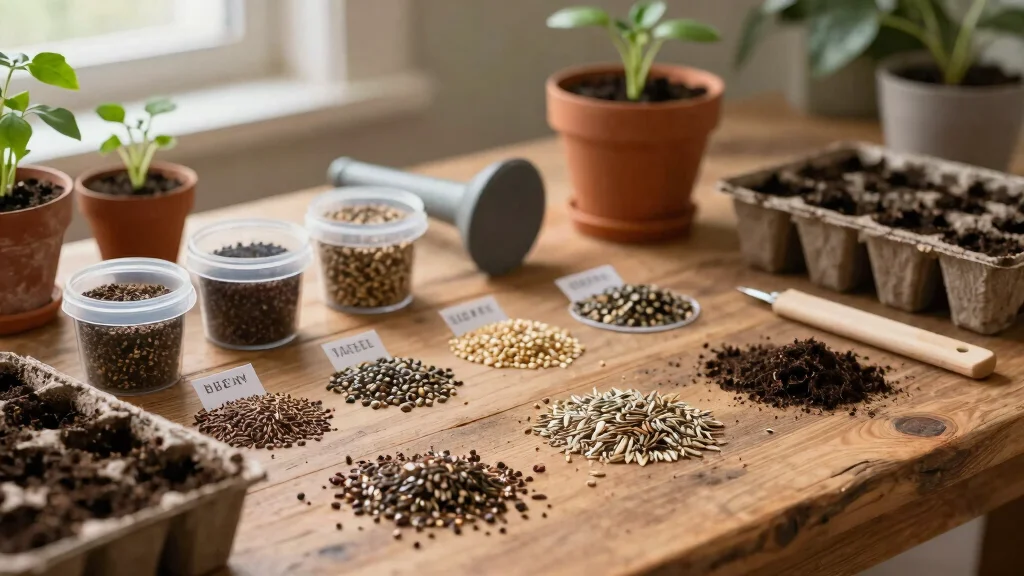
– Choosing the Right Seeds: Select ripe, healthy avocado seeds from fresh avocados for the best chance of successful germination.
– Germination Preparation: Properly prepare your seeds by cleaning and using a consistent germination method, whether it’s water or soil.
– Watering Strategy: Avocado seeds need regular watering but avoid overwatering; keep the soil moist yet well-drained for optimal growth.
– Pot Selection: Choose a pot with good drainage to prevent root rot. A pot that’s slightly larger than the seed is ideal for growth.
– Pruning and Fertilizing: Regularly prune your plant to encourage bushy growth and fertilize occasionally to provide essential nutrients for healthy development.
1. Selecting the Right Avocado Seeds
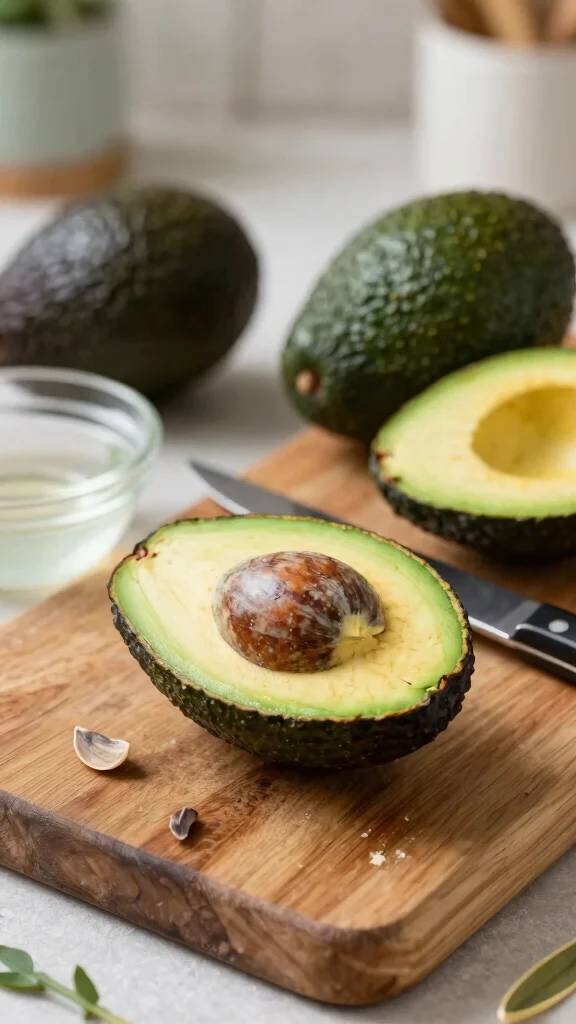
Do you want to kickstart your avocado plant journey? It all begins with selecting the right seed. Look for seeds that feel firm and heavy, with no blemishes or soft spots. Fresh seeds from ripe avocados are your best bet for successful sprouting. If you’re unsure, the Hass avocado seed is a great choice due to its hardiness and flavor. After picking out your seed, give it a gentle rinse to remove any leftover pulp, preparing it for the next step in its journey.
Always remember these tips:
– Choose seeds from fresh avocados; older seeds might not sprout.
– Inspect for blemishes that could indicate rot.
– Soak the seed in water for 24 hours to prep it for germination.
These simple steps will set you on the right path to cultivating your own avocado plant.
Selecting the Right Avocado Seeds
Editor’s Choice

Burpee, 9 Quarts | Premium Organic Potting Natural Soil Mix Food Ideal f…

Avocado Seed Starter Vase – Avocado Tree Growing Kit with Base and Stick…

Bylion Avocado Tree Growing Kits, Avocado Growing Vase Wooden Base Avoca…
2. Preparing the Seeds for Germination
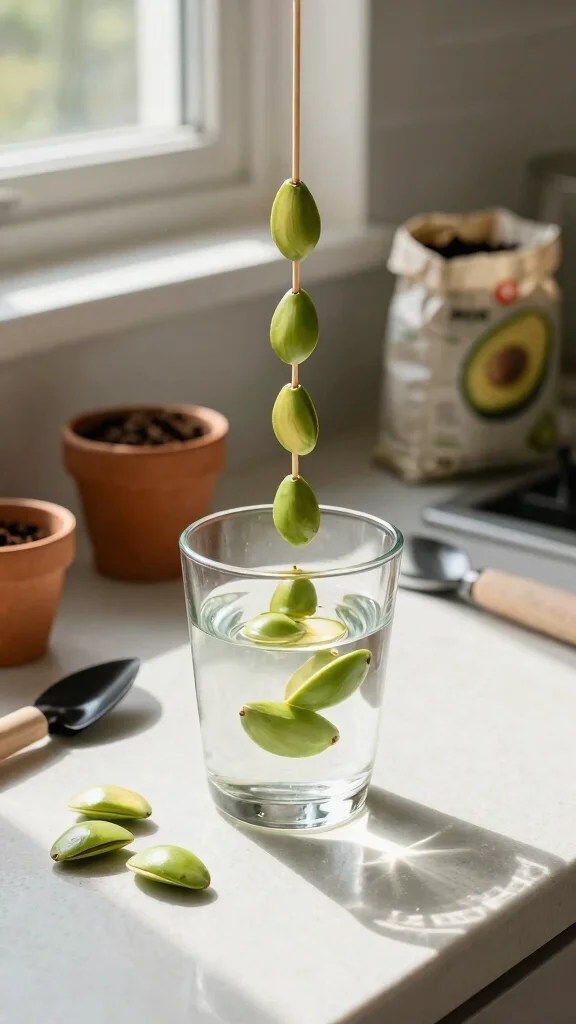
Ready to help your avocado seed grow? The next step is preparing it for germination. You can use the classic toothpick method by inserting toothpicks into the seed and suspending it over a glass of water, ensuring the bottom half is submerged. Change the water every few days to keep it fresh. Alternatively, plant the seed directly in soil, burying just the bottom half. If you go with the water method, place the glass in a warm, sunny spot to encourage growth.
Keep these handy tips in mind:
– Change the water often to prevent mold.
– Find a warm area with indirect sunlight for faster growth.
– Be patient; it may take weeks for your seed to sprout.
Hydration is key, whether you use the water or soil method, so ensure your seed stays moist for successful germination.
Preparing the Seeds for Germination
Editor’s Choice

Ahopegarden Indoor Garden Hydroponics Growing System: 10 Pods Plant Germ…

Miracle-Gro Indoor Potting Mix for Seed Starting, For Starting Vegetable…

Renmxj Plant Propagation Stations with Wooden Stand & 3 Glass Bulb Vases…
3. Watering Your Avocado Seed

Watering your avocado seed properly is crucial in its early stages. If you’re using the water method, make sure the bottom of the seed is submerged without being fully covered. For soil growers, water lightly but consistently to keep the soil moist. Avoid overwatering, which can lead to root rot. You’ll know it’s time to move to a pot when roots start emerging and the top of the seed splits.
Here are some watering tips:
– Use room temperature water to prevent shock.
– Mist the leaves if potted, mimicking the avocado’s natural humidity.
– Allow the top layer of soil to dry out slightly between waterings.
Finding the right watering balance is essential for your avocado plant’s thriving.
Watering Your Avocado Seed
Editor’s Choice
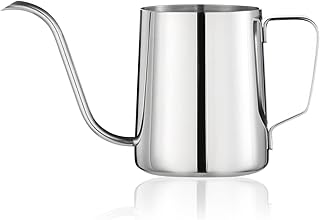
Small Watering Can for Indoor Plants, Mini Indoor Watering Can with Long…

Spray Bottle for Plants 2 Pack, 16oz – Ultra Fine Mist, Plant Mister Emp…

4-in-1 Soil Moisture Meter Digital PH Meter/Soil Moisture/Plant Temperat…
4. Choosing the Right Pot for Your Avocado Plant

Once your avocado seed has sprouted and roots become visible, it’s time for a pot upgrade. Select a pot that’s at least 6-8 inches wide to give it room to grow. Ensure it has drainage holes to prevent water from pooling. A terracotta pot is a fantastic choice as it allows air circulation to the roots, promoting healthy growth. Fill it with well-draining potting soil, mixing in perlite or sand to enhance drainage.
Key points to remember:
– Choose a pot that accommodates future growth.
– Ensure good drainage to avoid waterlogging.
– Use a potting mix that encourages aeration and drainage.
Picking the right pot is vital for your plant’s growth and overall health.
Choosing the Right Pot for Your Avocado Plant
Editor’s Choice

Back to the Roots 100% Organic Perlite | Made in the USA | Premium Nutri…

Soil Sunrise Avocado Tree Potting Soil Mix (12 Quarts) for Germinating, …

vensovo 6 Inch Terracotta & Clay Pots for Plant with Saucer – 4 Pack Med…
5. Positioning Your Avocado Plant for Optimal Growth

Finding the right spot for your avocado plant is essential for its health and vitality. Look for an area that receives bright, indirect sunlight for at least 6 hours daily. A south-facing window works well, but be cautious of direct sunlight, as it can scorch the leaves. If you notice the leaves stretching towards the light, it means your plant needs more sun.
Tips for optimal placement:
– Rotate your plant every few weeks for even growth.
– Monitor the temperature; avocado plants thrive in warmer conditions, ideally between 60-85°F (15-29°C).
– Shield your plant from cold drafts and sudden temperature shifts.
By providing proper lighting and environment, your avocado plant will flourish and produce beautiful foliage.
📹 Related Video: How To Stop Avocado Trees Being So Tall And Skinny
You might also like

Positioning Your Avocado Plant for Optimal Growth
Editor’s Choice

TempPro TP50 Digital Hygrometer Indoor Thermometer Room Thermometer and …

Aokrean Plant Grow Light, 48 LEDs Full Spectrum Grow Lights for Indoor P…
2 Pcs (8 Inch) Heavy Duty Rotating Swivel Stand – Lazy Susan with Steel …
6. Pruning Your Avocado Plant

Pruning is key to keeping your avocado plant healthy and well-shaped. As it grows, remove any dead or yellowing leaves and trim excessively long stems to encourage bushier growth. This process also helps improve airflow, preventing disease. Aim to prune every few months or as necessary to maintain its health.
Pruning tips include:
– Use clean scissors or pruning shears to avoid infection.
– Prune in the spring when the plant is actively growing.
– Don’t hesitate to cut back; avocado plants handle pruning well!
Regular pruning not only supports healthy growth but also gives your plant a full, attractive appearance.
❝Prune your avocado plant with care—dead leaves go, long stems trim back, and airflow improves. Regular pruning supports bushier growth for thriving avocado seed growing, turning a kitchen scrap into a vibrant houseplant you can be proud of.❞
Pruning Your Avocado Plant
Editor’s Choice

Fiskars Bypass Pruning Shears, 5/8″ Cut Capacity Gardening Scissors, Sel…

More Than Just a Plant: How to Care for Your Plants as They Care for You
7. Fertilizing Your Avocado Plant
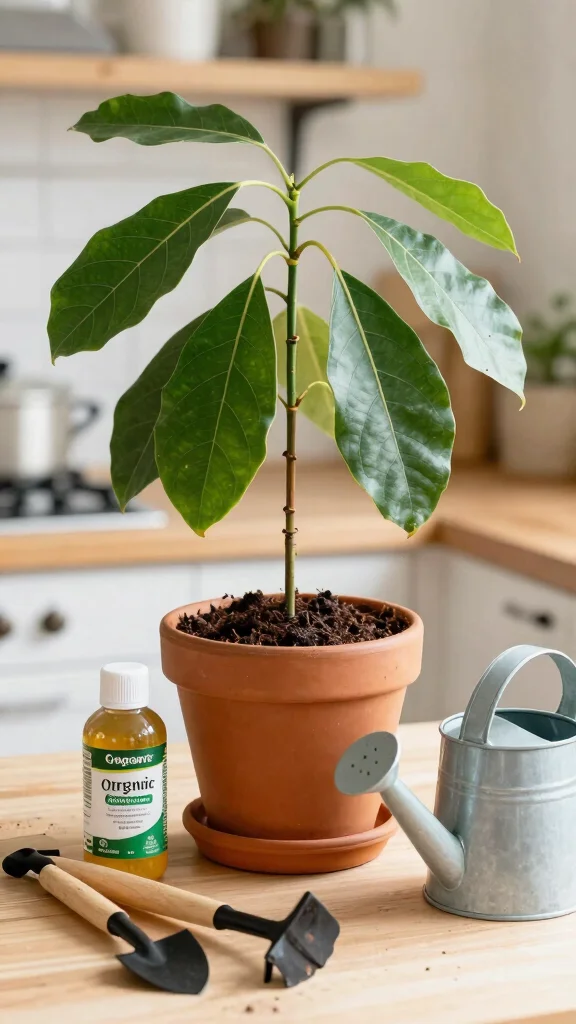
Fertilizing your avocado plant is essential for its growth and health. A balanced, water-soluble fertilizer works best, applied every 4-6 weeks during the growing season. Look for an N-P-K ratio of 10-10-10 or 20-20-20 for optimal results. Be careful not to over-fertilize, as this can harm your plant. Signs your avocado needs nutrients include slow growth or yellowing leaves.
Here are some fertilizing tips:
– Dilute the fertilizer with water before applying to prevent root burn.
– Consider organic options like compost or worm castings for sustainable gardening.
– Keep an eye on your plant and adjust the feeding schedule based on its health.
Proper fertilization will help your avocado plant thrive and become a stunning centerpiece in your home.
Fertilizing Your Avocado Plant
Editor’s Choice

16oz Fruit Tree Fertilizer for Avocados – Makes 32 Gallons of Avocado Tr…

Garutom Galvanized Watering Can for Outdoor Indoor Plants, 1 Gallon Deco…
8. Managing Pests and Diseases

Keeping your avocado plant healthy means staying alert for pests and diseases. Common pests like spider mites, aphids, and mealybugs can be troublesome. Regularly inspect your plant for signs of infestation and treat with neem oil or insecticidal soap if needed. Good air circulation around your plant can also help minimize the risk of fungal diseases. Yellowing leaves may indicate overwatering or nutrient deficiencies, while brown spots could signal pests or rot.
Protection strategies:
– Clean the leaves regularly with a damp cloth to remove dust and pests.
– Quarantine new plants to prevent cross-contamination.
– Maintain a clean growing environment to reduce disease risks.
By proactively caring for your plant, you’ll ensure it thrives and remains pest-free.
Fun fact: Up to 60% of avocado seed growing setbacks come from pests like spider mites and aphids. Regular inspections, a quick spray of neem oil or insecticidal soap, and good air circulation keep your plant thriving.
You Might Also Like
Managing Pests and Diseases
Editor’s Choice

Bonide Captain Jack’s Neem Oil, 32 oz Ready-to-Use Spray, Multi-Purpose …

Bonide Insecticidal Soap, 32 oz Ready-to-Use Spray Multi-Purpose Insect …
9. Repotting Your Avocado Plant

As your avocado plant grows, it will eventually need more space. Repotting is necessary when roots start growing out of the drainage holes or when growth stagnates. Choose a pot that’s 2 inches larger in diameter than the current one, ensuring it has good drainage. Gently remove the plant from its old pot, shaking off excess soil before placing it in fresh potting mix. This process can be done annually or as needed, depending on growth speed.
Repotting tips:
– Water your avocado plant a day before repotting to ease stress.
– Handle the roots gently to prevent damage.
– After repotting, keep the plant in a shaded area for a couple of days to help it acclimate.
Repotting gives your avocado plant the room it needs to keep flourishing, making it a lovely addition to your indoor garden.
Fun fact: Avocado roots can rapidly fill a pot—often needing a repot into a pot 2 inches larger in diameter as growth accelerates. Regular repotting keeps avocado seed growing healthy and prevents stagnation, with good drainage and fresh potting mix.
How To Choose The Right Pot for Your Avocado Plant
Choosing the right pot for your avocado plant is crucial for its growth and overall health. A good pot provides adequate drainage, sufficient space for roots, and stability as the plant grows. Here are some key factors to consider when selecting a pot for your avocado seed growing journey:
1. Size Matters
The size of the pot is essential for your avocado plant’s health. A pot that is too small can restrict root growth, which may stunt the plant. Aim for a pot that is at least 10 to 12 inches in diameter for young avocado plants. As the plant grows, you may need to repot it into a larger container to give the roots more room to grow.
2. Drainage Holes
Proper drainage is vital to prevent waterlogging, which can lead to root rot. Choose a pot that has several drainage holes at the bottom. If you find a pot you love that doesn’t have holes, you can easily drill some yourself. Just ensure that excess water can escape freely.
3. Material Selection
The material of the pot can affect its durability and the temperature of the soil. Clay pots are breathable and help keep the soil cool, but they can dry out quickly. Plastic pots retain moisture better but can overheat in direct sunlight. Consider your indoor gardening environment and choose a material that suits your plant’s needs.
4. Weight of the Pot
The weight of the pot is crucial for stability, especially as your avocado plant grows taller. Lightweight pots may tip over easily. Look for pots that are sturdy enough to hold the plant securely. If you prefer a lightweight pot, consider placing it inside a heavier decorative container for added stability.
5. Aesthetic Appeal
You’ll want your avocado plant to look good in your home or garden. Choose a pot that matches your personal style and complements your indoor gardening décor. Whether you prefer a rustic clay look or a modern ceramic finish, there are plenty of options available to suit your taste.
6. Cost Consideration
Pots can vary widely in price. While it might be tempting to go for the cheapest option, investing in a quality pot can pay off in the long run. Look for pots that offer durability without breaking the bank. A well-made pot can last for years and support your avocado plant through its growth stages.
Pro Tip: Always choose a pot that is slightly larger than the root ball of your avocado seed. This allows for healthy growth without causing the plant to become root-bound too quickly. Make sure to monitor your plant’s growth and be ready to repot when necessary! 🚀
Repotting Your Avocado Plant
Editor’s Choice

Organic Avocado Tree Potting Soil Mix 1qt, Enhance Growth and Transplant…

Miracle-Gro Organic Indoor Potting Mix – Protects Against Over and Under…

5Pcs Succulent Tools,Mini Garden Tools,Pruning Scissors as Plant Accesso…
10. Enjoying Your Avocado Plant

After months of careful nurturing, it’s time to reap the rewards of your hard work! While most indoor avocado plants may not produce fruit, they provide lush greenery that enhances your living space. Share your plant with friends, use it as a stunning centerpiece, or simply enjoy the process of caring for it. You can also take cuttings from your mature plant to propagate further, expanding your indoor garden.
Ways to celebrate your avocado plant:
– Share your gardening journey on social media to connect with fellow plant lovers.
– Use the leaves in floral arrangements to add a fresh touch.
– Embrace the sustainability aspect of your gardening journey!
Your avocado plant symbolizes not just a reclaimed kitchen scrap, but also your dedication to sustainable gardening.
Enjoying Your Avocado Plant
Editor’s Choice

Complete Starter Guide to Avocados: All You Need to Know About Growing, …
Bylion Avocado Tree Growing Kits, Avocado Growing Vase Wooden Base Avoca…

Miracle-Gro Indoor Plant Food for All Plants, Liquid Plant Food for Hous…
Conclusion

Cultivating an avocado plant from seed is a delightful journey that combines creativity, sustainability, and patience. From selecting the perfect seed to nurturing a beautiful indoor plant, each step brings its own rewards. Engaging in kitchen scrap gardening not only beautifies your space but also positively impacts the environment. As you watch your avocado plant thrive, consider sharing your experience and inspiring others to embark on their gardening journey. Let this be the start of a green adventure that turns your home into an urban oasis!
Note: We aim to provide accurate product links, but some may occasionally expire or become unavailable. If this happens, please search directly on Amazon for the product or a suitable alternative.
This post contains Amazon affiliate links, meaning we may earn a small commission if you purchase through our links, at no extra cost to you.
Frequently Asked Questions
How long does avocado seed growing take to sprout indoors and start a plant?
Germination for an avocado seed indoors usually takes several weeks to a couple of months, depending on temperature, moisture, and seed quality. In warm conditions (60–75°F / 15–24°C) with consistent moisture, you might see a sprout in 2–8 weeks and roots forming within a similar timeframe. For the classic water method, insert 3–4 toothpicks into the seed and rest it half-submerged in a glass of water, keeping it out of direct sun. Change the water every 2–3 days to prevent mold. Once the roots are an inch or two long and the shoot appears, transplant into a pot with well-draining soil. This is a quintessential avocado seed growing project that fits kitchen scrap gardening and urban avocado gardening.
Can I grow an avocado plant in a small urban apartment, and what care does it need?
Absolutely. An avocado plant can thrive in an apartment with bright light and careful watering. Place near a sunny window or under a grow light to provide 4–6 hours of light daily. Start seeds in water or soil, then move to a small pot with drainage and eventually upgrade as it grows. Use a light, well-draining potting mix and keep the soil evenly moist but not soggy. Maintain higher humidity with occasional misting and rotate the plant for even growth. Feed with a balanced fertilizer during the growing season. It’s a charming kitchen scrap gardening project that doubles as stylish indoor gardening, even if fruiting indoors may take years.
What are the most common mistakes when starting avocado seed cultivation from kitchen scraps?
Common mistakes include overwatering or letting the seed sit in standing water for too long, providing too little light, using a grocery seed treated with dormancy inhibitors, and placing the setup in a cold or drafty spot. Not cleaning the seed’s outer coating can slow germination, and using a poor quality or compacted potting mix can stunt growth. To avoid these issues, choose a clean seed, use a breathable container, ensure good drainage, give bright indirect light, and monitor moisture closely. This keeps your avocado seed growing on track and aligns with sustainable gardening and kitchen scrap gardening goals.
How should I care for an avocado seedling indoors after it sprouts?
Once your seed has sprouted, give it bright, indirect light and steady warmth (65–75°F). Water when the top inch of soil dries, avoiding soggy conditions. Start with a small pot and repot as roots fill the container, using a well-draining potting mix. Feed every 6–8 weeks during spring and summer with a balanced fertilizer. Keep an eye out for pests and prune sparingly if the plant becomes leggy, pinching the top to encourage branching. This is all part of good avocado plant care within indoor gardening.
Are there different propagation techniques for avocados beyond the water method?
Yes. Besides the classic toothpick-in-water method, you can try soil germination by planting the seed halfway in a moist potting mix with bottom heat and consistent moisture. Some growers start seeds in a damp paper towel inside a bag to speed up sprouting before planting. Each method is a valid seed propagation technique and fits kitchen scrap gardening and sustainable gardening ideals. The water method offers quick visible results, while soil methods can be more robust for long-term indoor gardening.
Related Topics
avocado seed growing
indoor gardening
kitchen scrap gardening
sustainable gardening
seed propagation techniques
beginner friendly
easy plant care
urban gardening
houseplant tips
green thumb
eco-friendly gardening
DIY gardening