
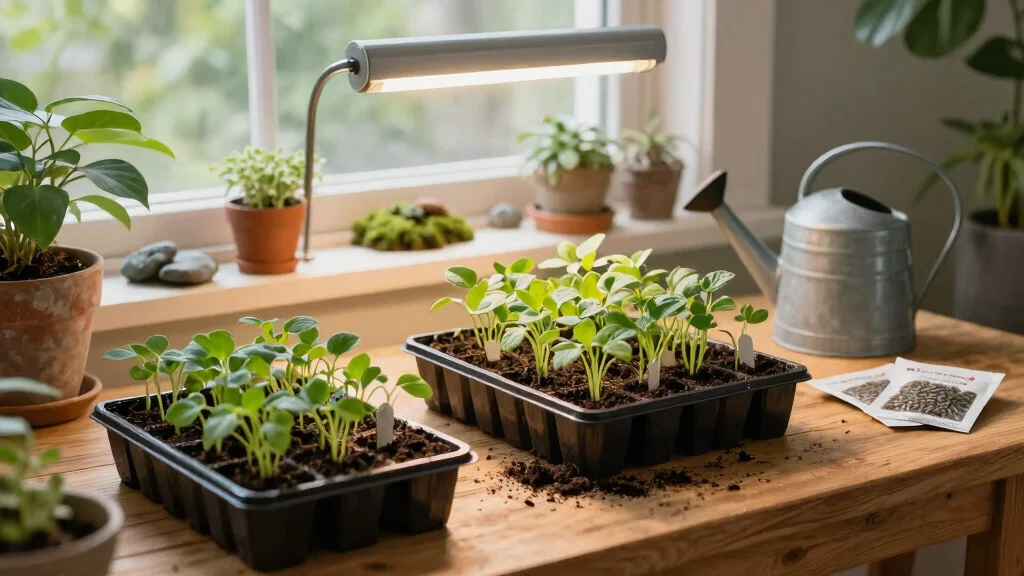
Gardening has a way of bringing joy and peace into our lives. As spring approaches, many of us find ourselves craving fresh herbs and beautiful flowers to fill our spaces. But starting a garden can feel overwhelming—especially if you’re working with a tight budget or a small space. That’s where DIY seed starting trays come in. They are not only affordable but also incredibly fun to make, allowing you to unleash your creativity while nurturing new plants.
If you’re someone who loves container gardening or is trying to maximize small spaces, this post is for you. Whether you’re a seasoned gardener or just starting out, you’ll appreciate these homemade seed starters that won’t break the bank. I pulled together seven simple DIY seed starting tray ideas that are practical, budget-friendly, and perfect for any home gardener looking to grow their own seedlings without spending a fortune.
You’ll get step-by-step guidance on each idea, so you can easily create your own seedling trays at home. From repurposing old items to using sustainable materials, these suggestions will help you connect with your plants while being kind to your wallet. Let’s dive into these creative and easy solutions for starting your gardening journey on a budget!
Key Takeaways
– Affordable Solutions: Discover various DIY seed starting tray ideas that won’t strain your budget, making gardening accessible for everyone.
– Space-Saving Techniques: Learn methods tailored for small spaces, perfect for urban gardeners looking to maximize their container gardening efforts.
– Creative Repurposing: Many ideas utilize items you already have at home, such as egg cartons and yogurt cups, helping reduce waste while starting your plants.
– Easy Step-by-Step Guides: Each seed starting tray concept comes with clear, actionable instructions, ensuring you can create your own trays with ease.
– Start Your Gardening Journey: These homemade seed starters will empower you to grow your own seedlings, bringing fresh vegetables and flowers to your home.
1. Egg Carton Seed Starters
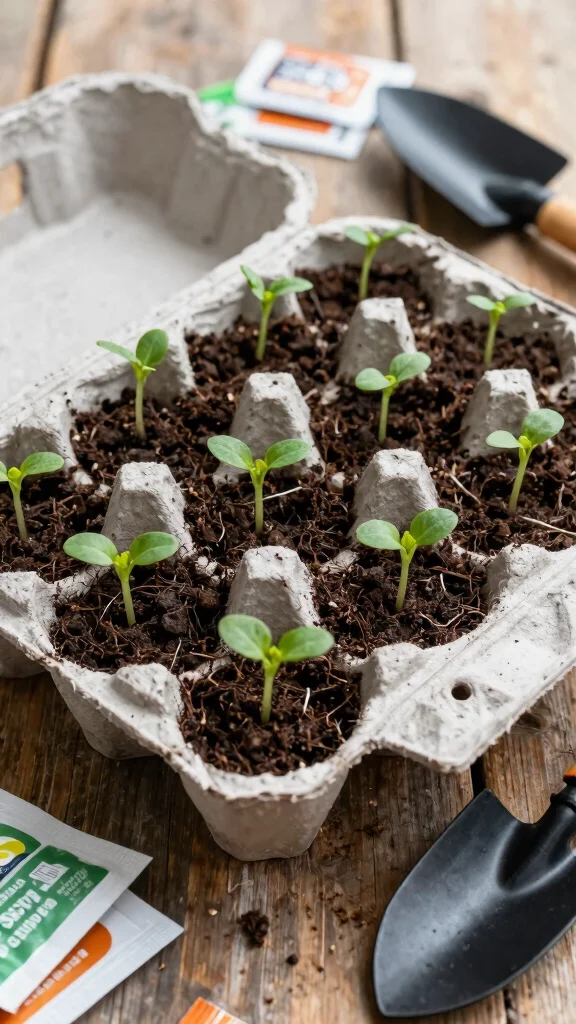
Looking to start your gardening journey on a budget? Transforming an egg carton into a seed starter is both economical and eco-friendly! These small compartments are perfect for nurturing your seeds with minimal effort. Just fill each cup with potting mix, place a seed inside, and give it a gentle watering. As the seedlings flourish, you can plant the entire carton directly in the soil since it’s biodegradable.
To ensure your seeds thrive, remember to cut drainage holes in the bottom. This simple step prevents overwatering and keeps your seeds healthy. Egg cartons can accommodate a range of plants, from aromatic herbs to vibrant flowers, enhancing your gardening experience. Watching those tiny seedlings emerge from something you would normally discard is incredibly satisfying!
Key benefits of using egg cartons:
– Biodegradable and can be planted directly in soil
– Versatile for various types of seeds
– Cost-effective recycling solution
– Fun and engaging for kids and adults alike
This creative approach not only helps your garden grow but also promotes sustainability. You’ll enjoy watching your seedlings thrive while making a positive impact on the environment.
📹 Related Video: Starting Seeds in Egg Cartons
Egg Carton Seed Starters
Editor’s Choice

JapanBargain 1942, Japanese Long Spout Watering Can for Bonsai Succulent…

120 Cells Seed Starter Tray, 10 Pack Biodegradable Peat Pots with 100 La…

Burpee, 9 Quarts | Premium Organic Potting Natural Soil Mix Food Ideal f…
2. Plastic Container Trays
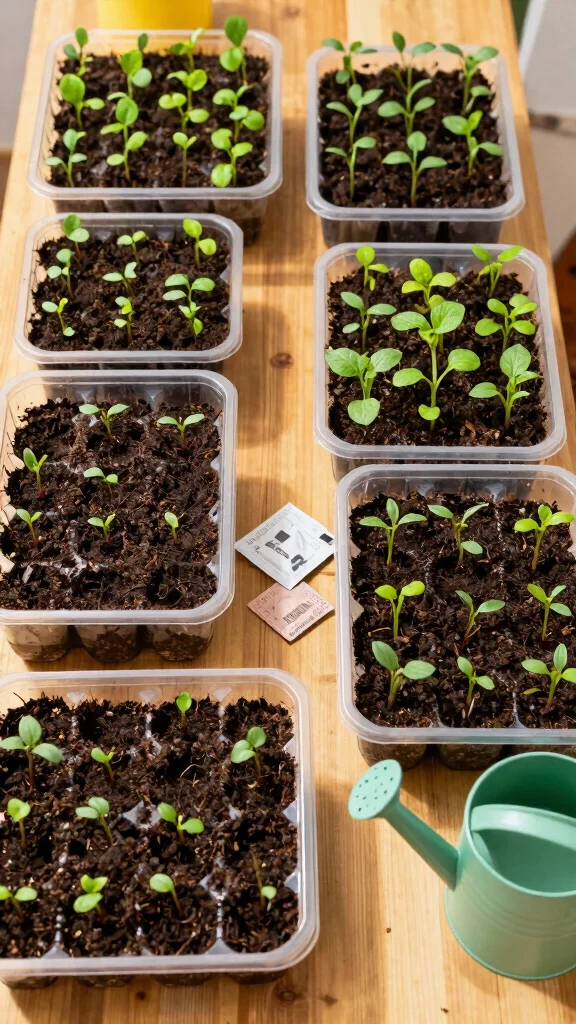
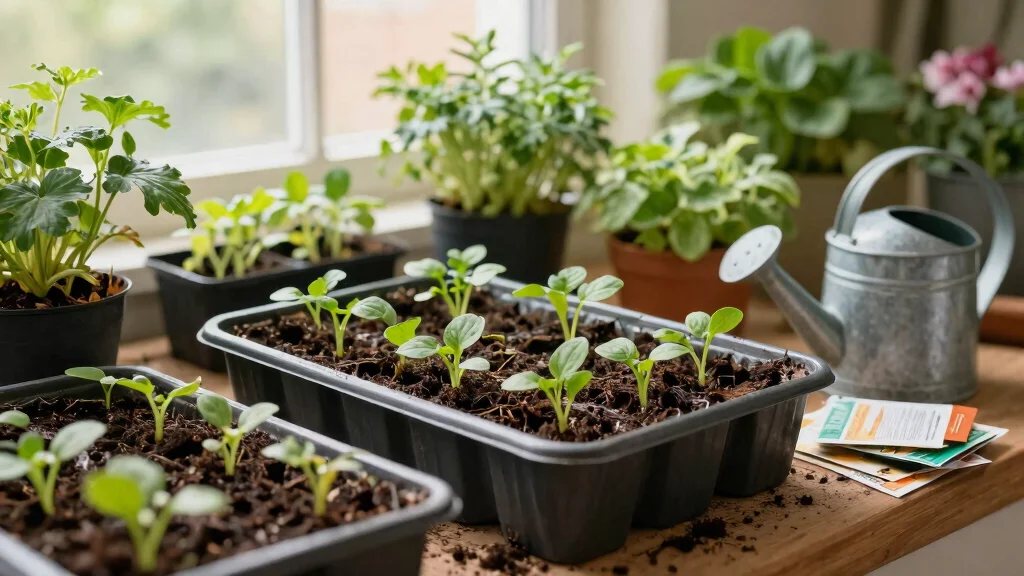
Do you have an assortment of plastic containers cluttering your kitchen? These items can be easily repurposed into effective seed starting trays! Cut-down milk jugs or takeout containers work wonderfully. Just remember to poke drainage holes in the bottom to keep your seeds healthy. Fill them with soil, sow your seeds, and cover lightly.
For added moisture retention, consider covering the top with plastic wrap until germination occurs. This mini greenhouse effect helps maintain humidity and warmth, ensuring a successful start for your seeds. Once your seedlings reach a few inches, you can easily transplant them into larger pots or your garden. Using plastic containers is not only budget-friendly but also an excellent way to minimize waste.
Here are some tips for using plastic containers:
– Ensure proper drainage by poking holes
– Use clear containers for easy monitoring of moisture
– Label your containers to keep track of different seeds
– Start with smaller containers for initial growth
This method allows you to grow a lush garden while promoting recycling in your home!
Ever stockpiled plastic containers? Turn them into a diy seed starting tray: punch drainage holes, fill with soil, and cover with plastic wrap to lock in moisture until germination.
Plastic Container Trays
Editor’s Choice

Dalzom® 300Pcs 4″ Plant Labels with Marker Pen, Waterproof Plastic Plan…

Reynolds Kitchens Quick Cut Plastic Wrap, 225 Square Feet

Back to the Roots 3-in-1 Seed Starting Mix 6 Quarts, 100% Organic & USA …
3. Wooden Boxes and Crates
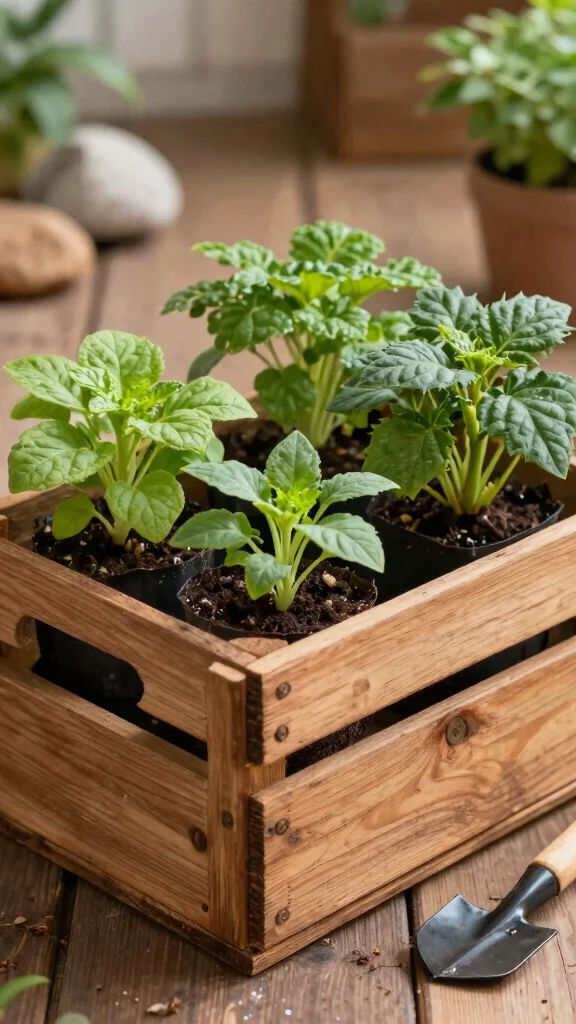
Ready to elevate your gardening game? Wooden boxes or crates can make delightful seed starting trays! They add a rustic touch and are ideal for grouping multiple seedlings. Start by lining the bottom with cardboard or newspaper for drainage, then fill with potting soil. This way, you can grow various seed types in one beautiful container.
Want to personalize your setup? Consider painting or staining the wooden crates to complement your garden decor. This not only enhances their visual appeal but also makes them a stylish feature on your patio or balcony. Plus, they can serve as functional decor while your seedlings flourish!
Benefits of using wooden boxes:
– Natural aesthetics enhance your gardening space
– Multiple seeds can be grown together
– Durable and reusable for many seasons
– Customizable to match your style
With this approach, you’ll create a beautiful environment for your plants while enjoying the charm of wooden containers.
Wooden Boxes and Crates
Editor’s Choice

Miracle-Gro Potting Mix – For Container Plants, Flowers, Vegetables, Shr…

Furniture Clinic Wood Stain | Dark Oak | Water Based | Fast Drying, Low …

yarlung 10 Pack Small Bamboo Saucers, 7 Inch Plant Saucers Rectangular F…
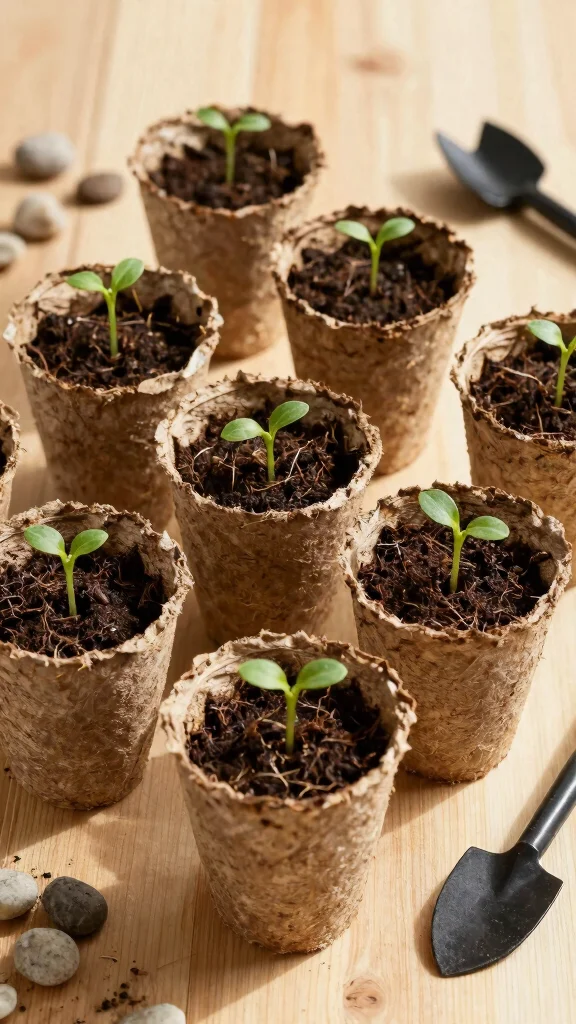
4. Newspaper Seed Pots

Looking for an eco-friendly seed starting solution? Old newspapers can be transformed into practical seed pots! This method is simple and effective. Fold strips of newspaper into small cups, ensuring the bottom is securely sealed. Fill each pot with soil, plant your seeds, and watch them grow!
When it’s time to transplant, you can place the entire pot into the ground, minimizing transplant shock. For added support, use a recycled glass or jar to shape your pots, which helps them maintain their structure. You can also adjust the size of your pots depending on the seeds you’re planting.
Advantages of using newspaper pots:
– Environmentally friendly and biodegradable
– Customizable size for different seeds
– Easy to make using materials at home
– Reduces plastic waste significantly
This approach not only supports your seedlings’ growth but also contributes positively to the environment, making it a smart choice for all gardeners.
You might also like
Newspaper Seed Pots
Editor’s Choice
Napia Peat Pots Seed Starter – 45 Pack 3.15 inch Biodegradable Seed Star…

Miracle-Gro Indoor Potting Mix for Seed Starting, For Starting Vegetable…
5. Yogurt Cups and Containers
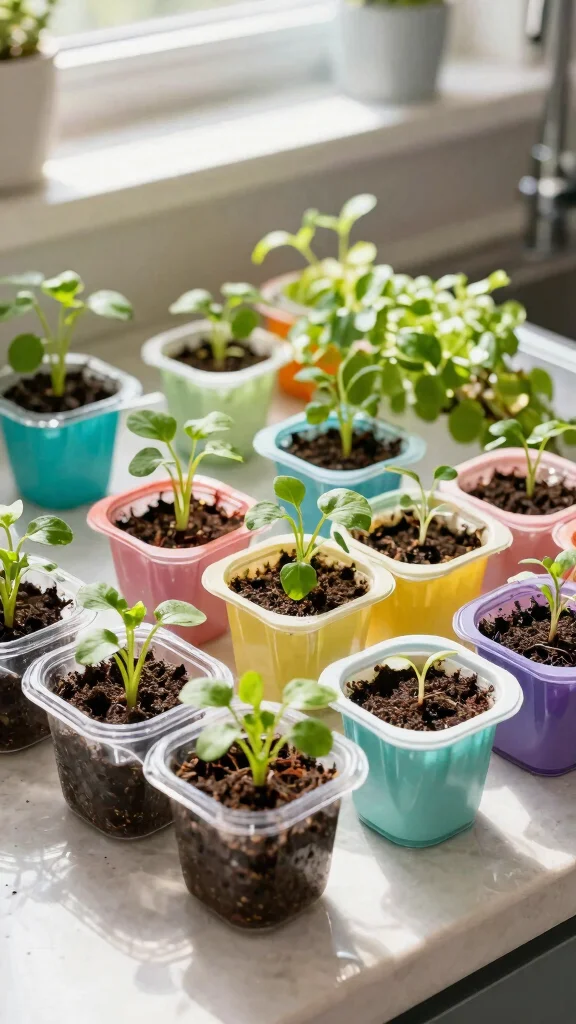
Don’t throw away those empty yogurt cups—convert them into handy seed starting trays! These cups are perfectly sized for starting seeds, and just like others, remember to poke holes in the bottom for drainage. Fill them with potting soil, and you’re ready to plant! The transparency of some cups allows you to easily monitor moisture levels and determine when your seedlings are ready to move to new homes.
If you have a child who enjoys crafting, let them decorate the yogurt cups with paint or stickers. This adds a personal touch and can ignite their interest in gardening! Using yogurt containers is a smart way to minimize waste while cultivating a healthy garden at home.
Here are some benefits of yogurt containers:
– Reusable and reduces waste
– Perfect size for seed starting
– Kid-friendly activity for garden education
– Easy to monitor growth with clear containers
This creative option allows you to grow your garden while having fun and making a positive impact!
Did you know that reusing everyday yogurt cups can turn into a DIY seed starting tray and save you up to 40% on seed-raising costs? Small, transparent cups let you watch moisture, while holes ensure drainage—perfect for urban gardens.
Yogurt Cups and Containers
Editor’s Choice

VITEVER 100pcs Plant Labels, T-Type Plastic Tags with Marker Pen, Waterp…
Miracle-Gro Indoor Potting Mix for Seed Starting, For Starting Vegetable…
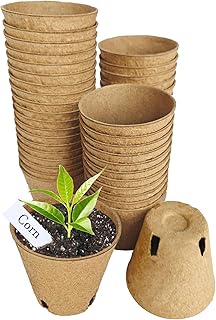
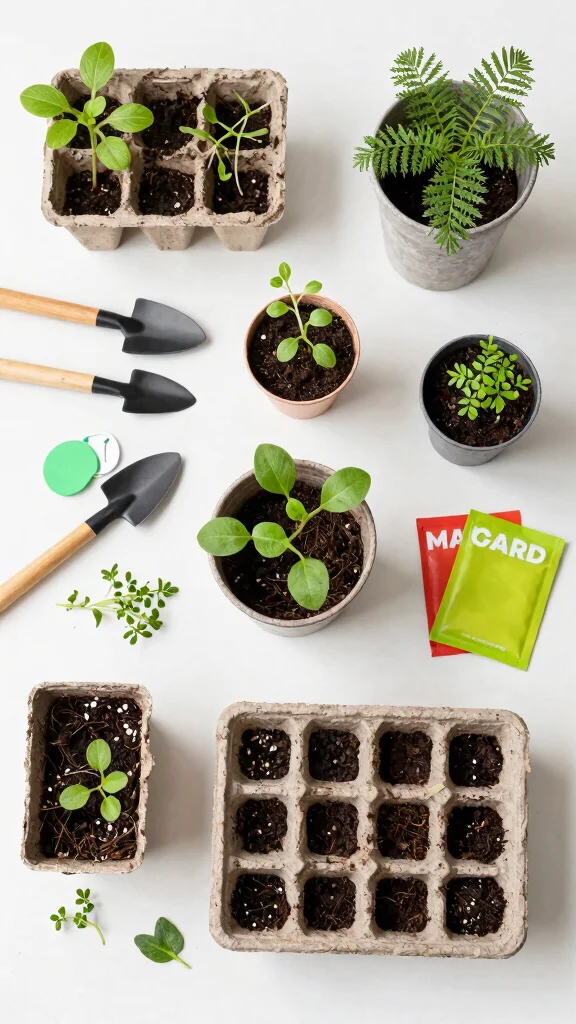
6. Biodegradable Seedling Pots
Want to take your gardening to the next level for the planet? Consider biodegradable pots! These eco-friendly options can be crafted from materials like coconut coir, peat, or recycled paper. Their design allows them to break down in soil, enabling your seedlings to develop strong roots.
Simply fill them with soil, plant your seeds, and when it’s time, transplant them directly into your garden! For those who love a DIY project, making your biodegradable pots from paper or cardboard can be a rewarding experience.
Benefits of biodegradable pots:
– Support root growth with natural breakdown
– Eco-friendly materials for sustainable gardening
– Customizable if you make your own
– Perfect for urban gardening to promote sustainability
These pots not only encourage healthy growth but also contribute to a greener planet, making them a great choice for conscientious gardeners.
You Might Also Like
How To Choose the Right DIY Seed Starting Tray
Choosing the right seed starting tray can make a big difference in your gardening success. Here’s how to pick the best option for your budget and space.
1. Size Matters
Consider the dimensions of your growing space. A standard seed tray is usually around 10 x 20 inches, but you can find various sizes based on your needs. If you’re limited on space, smaller trays or individual pots may work better. For larger gardens, bigger trays can help you start multiple seeds at once.
2. Material Types
DIY seed trays can be made from various materials, including plastic, wood, or biodegradable options. Plastic trays are durable and reusable, while biodegradable trays, like those made from paper or peat, are great for the environment. Choose a material that fits your gardening style and longevity needs.
3. Drainage Features
Proper drainage is crucial for healthy seedlings. Look for trays with drainage holes to prevent overwatering. If your DIY option doesn’t have holes, you can easily add them. Ensure your seedlings won’t sit in water, which can cause root rot.
4. Budget-Friendly Options
You don’t need to break the bank to start seeds. Explore homemade seed starters using recycled materials like egg cartons, yogurt cups, or even newspaper pots. Not only will this save money, but it also helps reduce waste. Keep in mind that even inexpensive materials can work effectively if you provide proper care.
5. Ease of Use
Think about how easy it will be to use the trays. Some materials are more lightweight and portable, making them easier to move around. If you plan to transfer seedlings outdoors later, choose trays that can withstand handling. Look for options that allow for easy access and care for your growing plants.
6. Compatibility with Your Growing Method
Lastly, consider the type of gardening you are doing. If you are into container gardening, select trays that fit inside your containers. For more traditional garden beds, larger trays might be better. Make sure the seed trays you choose align with your gardening approach for the best results.
Pro Tip: If you’re experimenting with different seeds, consider using a variety of trays. This way, you can test what works best for each type of plant while keeping your options budget-friendly. Happy gardening! 🌱
Biodegradable Seedling Pots
Editor’s Choice

JNYONG 60 Packs 4 Inch Peat Pots,Biodegradable Pots for Seedlings with D…

JERIA 50-Pack 3.15 Inch Peat Pots for Seedling with 50 Pcs Plant Labels,…

JNYONG 60 Packs 3.15 Inch Peat Pots,Biodegradable Pots for Seedlings wit…
7. Repurposed Cans and Jars

Don’t overlook your kitchen pantry for old cans or jars—they can be charming seed starting trays! First, clean them thoroughly, then poke drainage holes in the bottom, and fill with potting soil. You can choose various sizes, from small tuna cans to larger coffee cans, giving you flexibility based on your gardening needs.
Want to add a personal touch? Customize your cans with paint or twine for a unique look! These containers are ideal for herbs or small plants, adding a rustic, industrial feel to your urban garden setup. Plus, it’s a fun way to reuse materials while enhancing your green space!
Key highlights of using repurposed cans:
– Unique aesthetic adds character to your garden
– Flexible sizes for different plants
– Easy to personalize with decorations
– Promotes recycling in your home
This creative method not only helps you garden efficiently but also encourages sustainable practices in your home!
Transforming old cans into a diy seed starting tray is the kind of thrifty magic urban gardeners love. Keep a few sizes on hand, drill drainage, and fill with soil—your herbs will pop up faster than you expect, and your kitchen will feel like a mini greenhouse.
Repurposed Cans and Jars
Editor’s Choice

RGBDOT Kids Gardening Set Paint and Plant Stoneware Flower Growing Kit w…

Power Drill Cordless: DEKOPRO Cordless Drill 20V Electric Power Drills S…
Miracle-Gro Indoor Potting Mix for Seed Starting, For Starting Vegetable…
Conclusion
With these seven DIY seed starting tray ideas at your disposal, you’re fully equipped to kickstart your urban gardening journey without spending a fortune.
Each method not only saves you money but also allows you to express your creativity and resourcefulness. From egg cartons to repurposed cans, there are endless possibilities to nurture those seeds into thriving plants.
Embrace the joy of home gardening and enjoy the satisfaction that comes with growing your own food or flowers. Happy gardening!
Note: We aim to provide accurate product links, but some may occasionally expire or become unavailable. If this happens, please search directly on Amazon for the product or a suitable alternative.
This post contains Amazon affiliate links, meaning we may earn a small commission if you purchase through our links, at no extra cost to you.
Frequently Asked Questions
Question: What is a diy seed starting tray and why is it perfect for urban container gardening?
A diy seed starting tray is any shallow, reusable setup you create at home to start seeds. It can be as simple as repurposed plastic boxes, egg cartons, or clamshell containers with a few drainage holes. It’s perfect for urban container gardening because it keeps many seedlings organized in a tiny footprint and lets you start plants indoors before moving them to pots or a balcony garden. Best of all, it fits budget gardening since you can reuse items you already have. Quick tips: punch drainage holes, use a lightweight seed starting mix, label each section, and give seedlings bright light. If you want faster germination, add a clear lid or plastic wrap to trap humidity.
Question: What are budget-friendly diy seed starting tray ideas I can make with things at home?
Here are practical diy seed starting tray ideas you can try without breaking the bank: 1) repurposed yogurt cups or small containers lined in a shallow tray; punch a few drainage holes and keep them in a sunny spot. 2) Plastic clamshells or bakery containers cut to fit a tray. 3) An egg carton with a plastic liner cut to tray shape. 4) A DIY self-watering setup using a shallow dish and a perforated inner tray. 5) Inexpensive seed flats made from leftover packaging. For each, fill with a light seed starting mix, moisten before sowing, and keep them on a windowsill or balcony for best results. Label seeds and rotate trays to avoid overcrowding. These ideas support budget gardening and container gardening.
Question: How do I choose the right seed starting mix and keep seedlings hydrated in a diy seed starting tray on a budget?
Choose a light, sterile seed starting mix or a homemade blend with good drainage. Avoid heavy garden soil that stays compact. Keep moisture even with bottom watering and, if possible, use a clear humidity lid to maintain consistent moisture during germination. Place trays in a bright spot with warmth but not harsh midday sun. Once true leaves appear, start planning for transplant to larger container gardening pots. These steps maximize germination while keeping costs down, a key benefit of budget gardening.
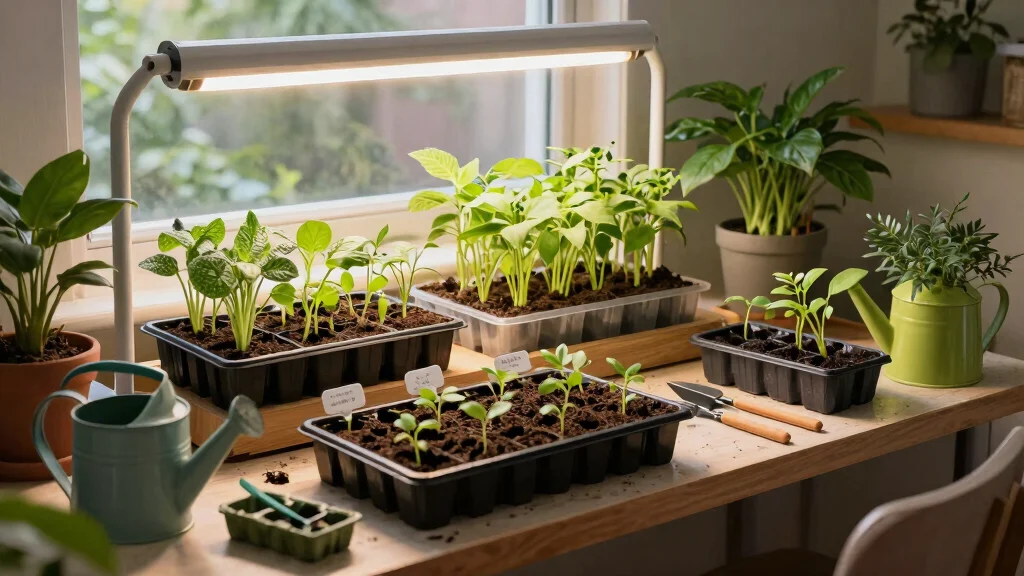
Question: Which tray designs work best for small-space container gardening on a balcony or windowsill?
Look for modular, shallow trays or stackable designs that fit your available space. Self-watering inserts are great for busy urban gardeners, as they reduce daily upkeep and prevent drying out in hot weather. If space is ultra-tight, choose compact 2–3 inch pots that nest in a single larger tray. Whatever design you pick, ensure each cell has drainage and is easy to label—these are simple gardening tips for urban container gardening that pay off with healthier seedlings.
Question: How can I transplant seedlings from a diy seed starting tray into containers without damaging the roots?
Wait until seedlings have their first true leaves before transplanting. Steps: 1) water the tray a few hours before to loosen the soil; 2) gently lift the seedling with a spoon or small fork, keeping as much root soil intact; 3) prepare a larger pot with fresh, well-draining potting soil and make a hole large enough for the root ball; 4) place the seedling at the same depth it grew in the tray and firm the soil around; 5) water well and place in bright light while gradually hardening off. This careful transplant process minimizes root damage and supports steady growth in container gardening.
Related Topics
diy seed starting tray
seedling trays
budget gardening
homemade seed starters
urban gardening
container gardening
small space gardening
easy gardening projects
beginner friendly
seasonal planting
sustainable gardening
eco-friendly gardening